Launch a Linux Virtual Machine with Amazon EC2
AWS Services > Amazon EC2 to open the service console.
Select Launch Instance to create and configure your virtual machine

choose an Amazon Machine Image (AMI) > Amazon Linux AMI and click Select

Choose an Instance type : various combinations of CPU, memory, storage, and networking capacity.default option of t2.micro
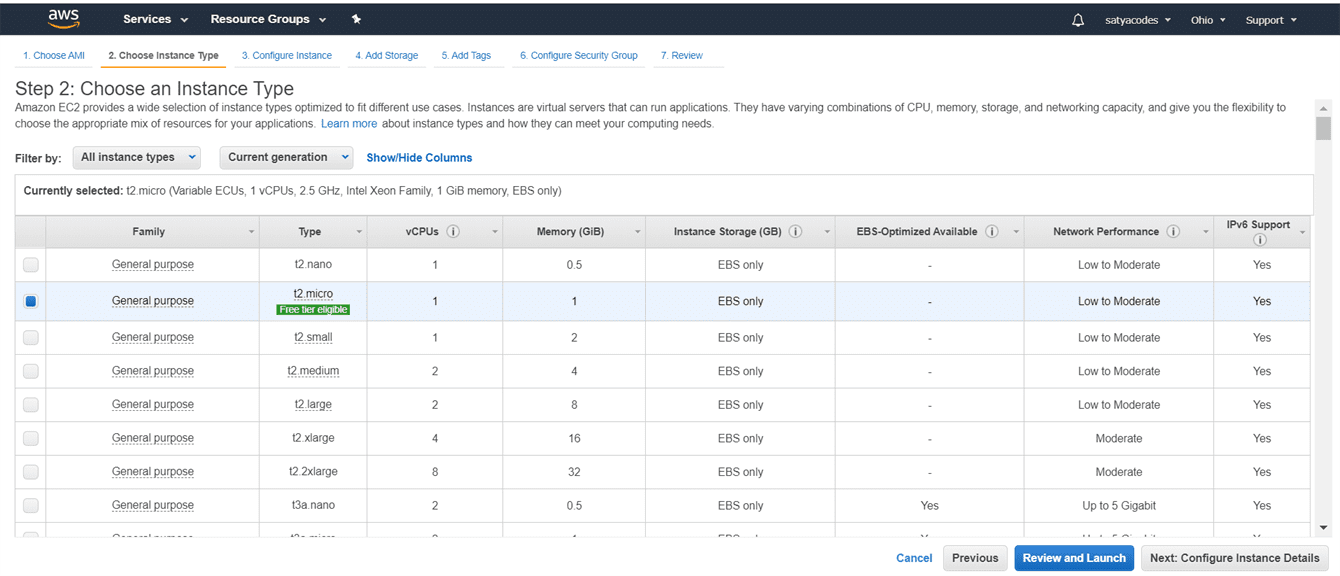
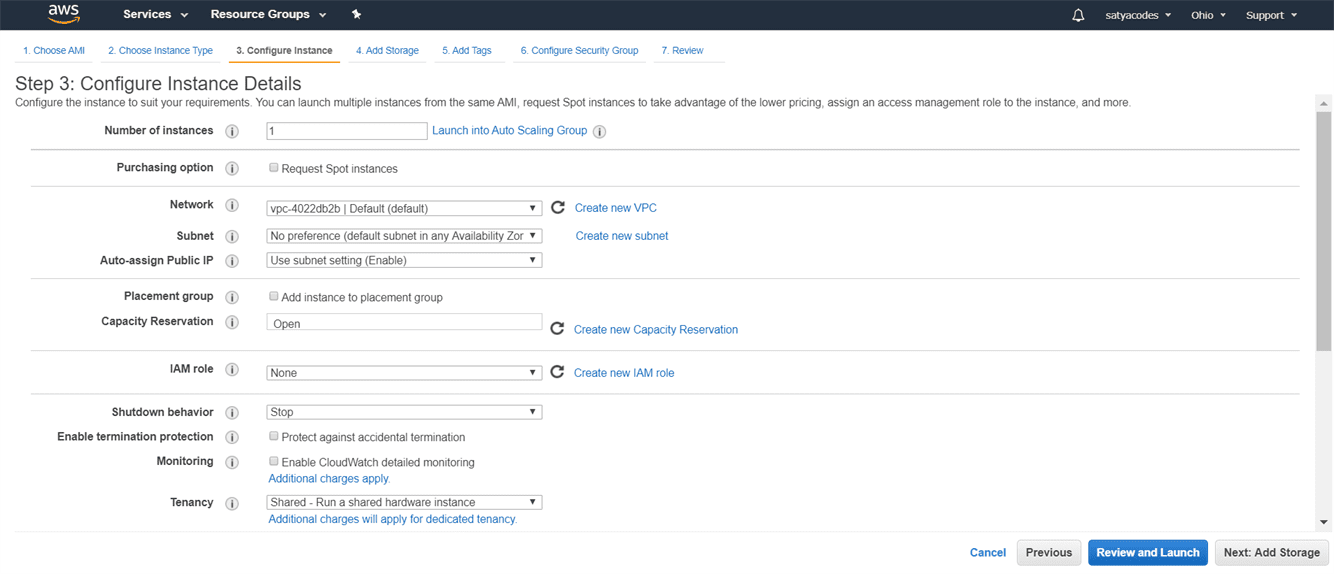
Configure Instance
Add Storage

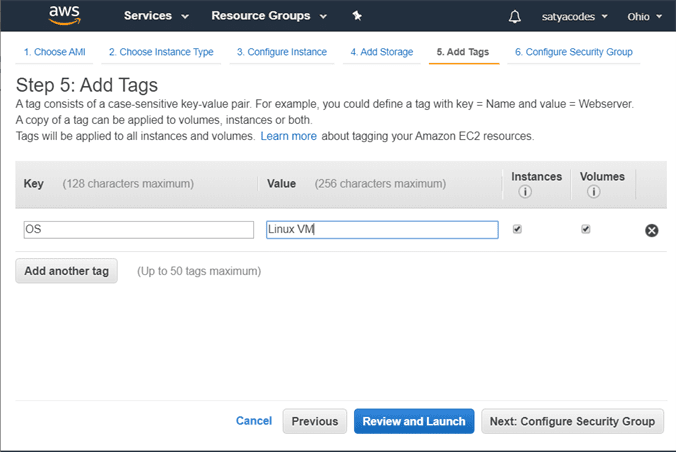
Add Tags
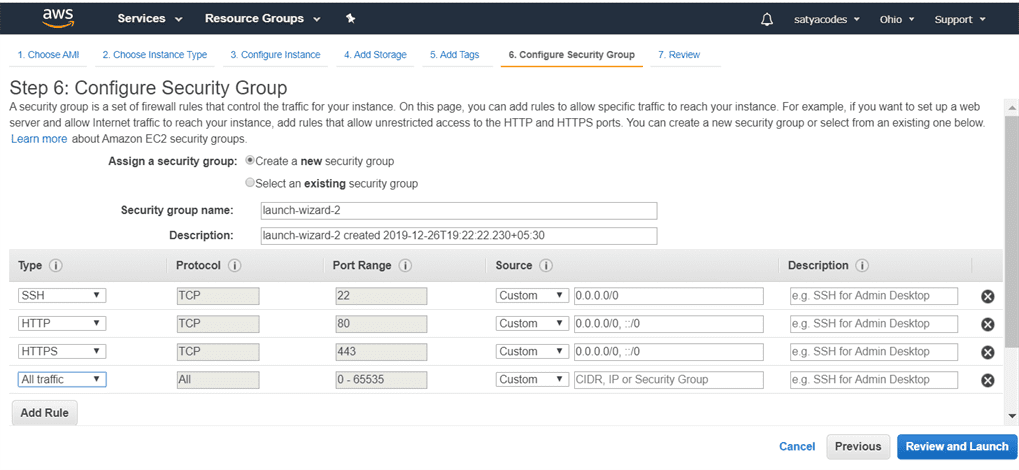
Configure Security Groups & SSH connection details - Click Review and Launch
On the next screen you will be asked to choose an existing key pair or create a new key pair. A key pair is used to securely access your Linux instance using SSH
- Select Create a new key pair and give it the name LinuxVM. Next click the Download Key Pair button.
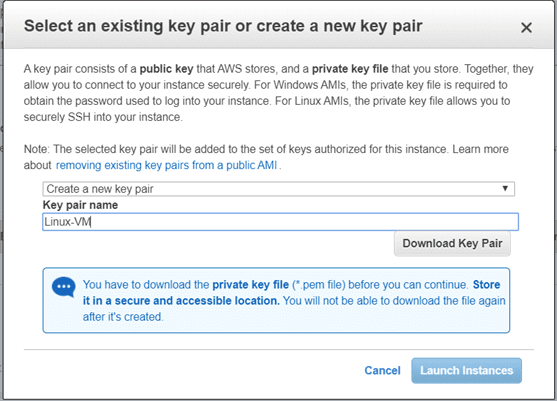
saving your key pair in your user directory in a sub-directory called .ssh (ex. C:\user\{yourusername}\.ssh\Linux-VM.pem).
Click View Instances- Copy the Public IP address of your AWS instance, so you can use it when we connect to the instance using SSH
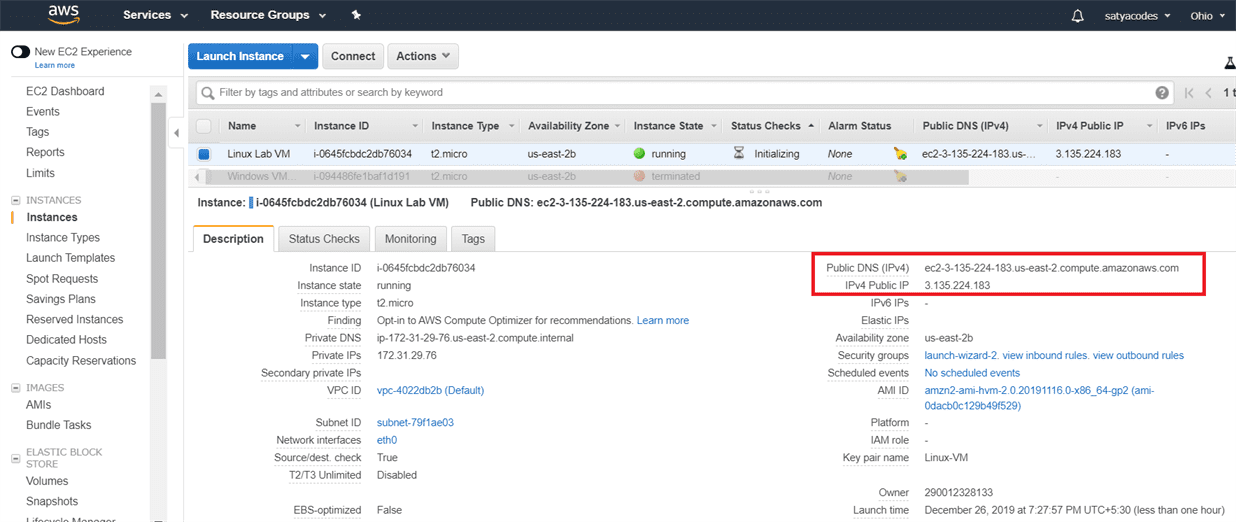
Login to VM
Login Using Git
-
Download & Install Git
-
Open Git Bash > Run
ssh -i {full path of your .pem file} ec2-user@{instance IP address}
ssh -i ‘C:\Users\Kavetis\.ssh\Linux-VM.pem’ ec2-user@3.135.224.183
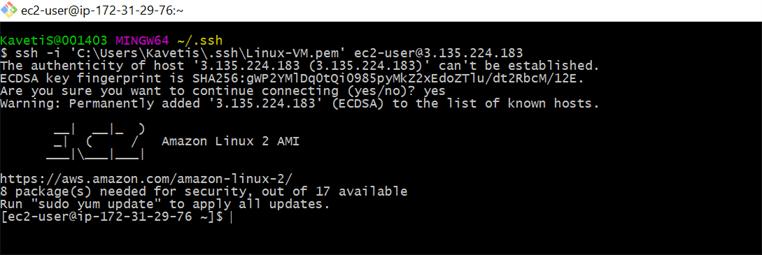
Login Using Putty
1.Open Downloaded .pem file
-
If we are using Linux system, we can directly use .pem file for connection.
-
If we are using Windows System, we don’t have SSH directly.
we use PuttY for SSH connections. but Putty doesn’t support .pem file it only supports .ppk file. for that we need to convert .pem file to .ppk file
2.Covert .pem to .ppk using Putty
-
Launch PuttyGen
-
Load .pem file
-
Save Private Key: Linux-VM.ppk
3.Open Putty
-
Enter Ip : 18.216.255.66
-
Connection Type : SSH
-
Left Menu > SSH >+AUTH : Browse saved Linux-VM.ppk file
Remember : Default user for EC2 Instance is : “ec2-user”