Elastic Beanstalk
AWS Elastic Beanstalk! Comes under PaaS model, which is Platform as a Service.
So far we recreated EC2 instances & if you want to to run or deploy Java based applications, first we need to install JDK and Apache Tomcat to deploy the application.
All these are doing in Manual way but now using Elastic beanstalk we don’t need to install software or Configure platform related things like Java, Apache Tomcat, you can just concentrate on implementing the application logic elastic beanstalk take care about the platform things like like Java installation and Apache Tomcat configuration.
You can simply upload your code and Elastic Beanstalk automatically handles the deployment, from capacity provisioning, load balancing, auto-scaling to application health monitoring. At the same time, you retain full control over the AWS resources powering your application and can access the underlying resources at any time
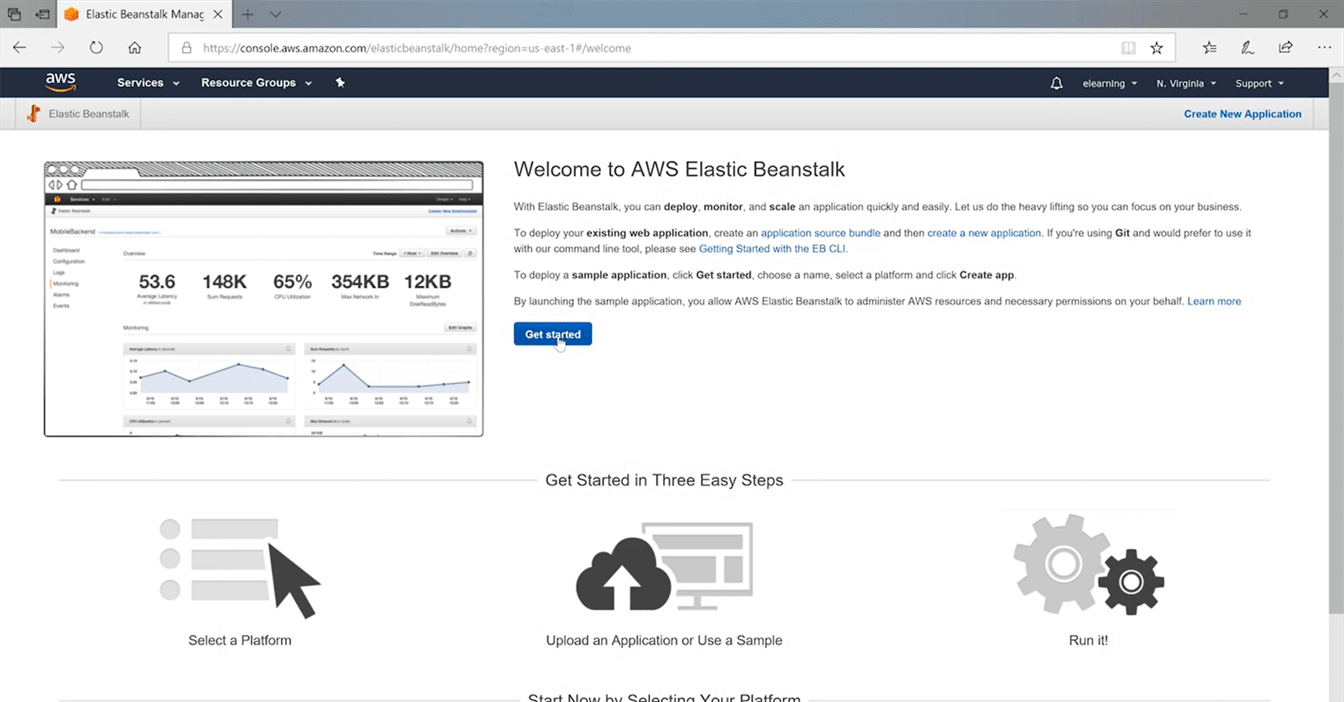
Lab – Deploy an Application on Elastic Beanstalk
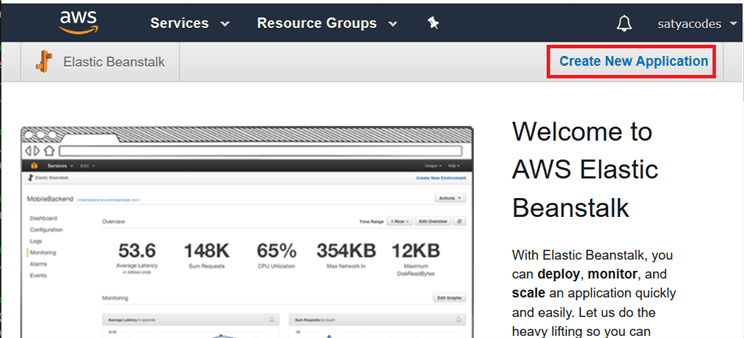
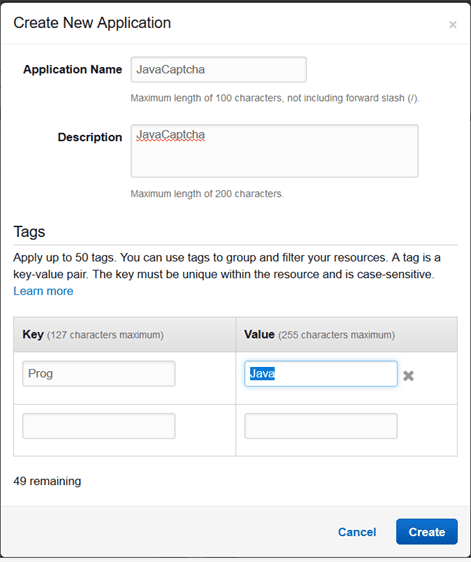
Step 1: On Elastic Beanstalk console click on Create New Application option.
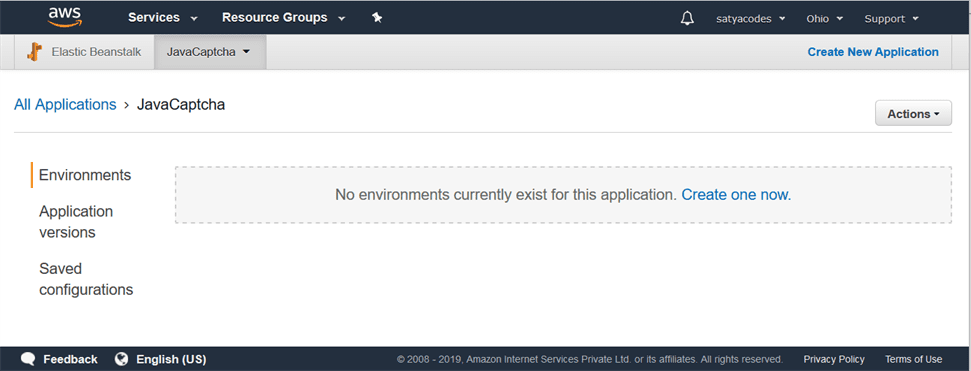
Step 2: Actions tab and select Create Environment option. Beanstalk provides you with an option where you can create multiple Environments for your application.
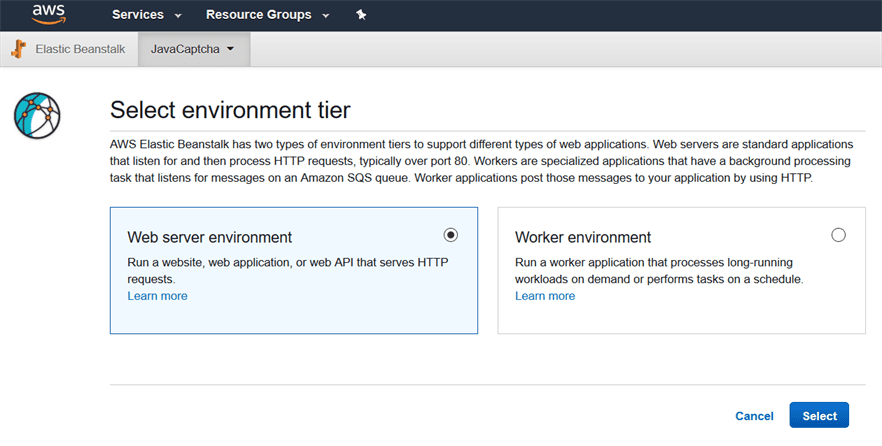
Step 3: Choose among two different Environment Tier options. Choose Web Server Environment - if you want your application to handle HTTP requests or choose Worker Environment to handle background tasks.
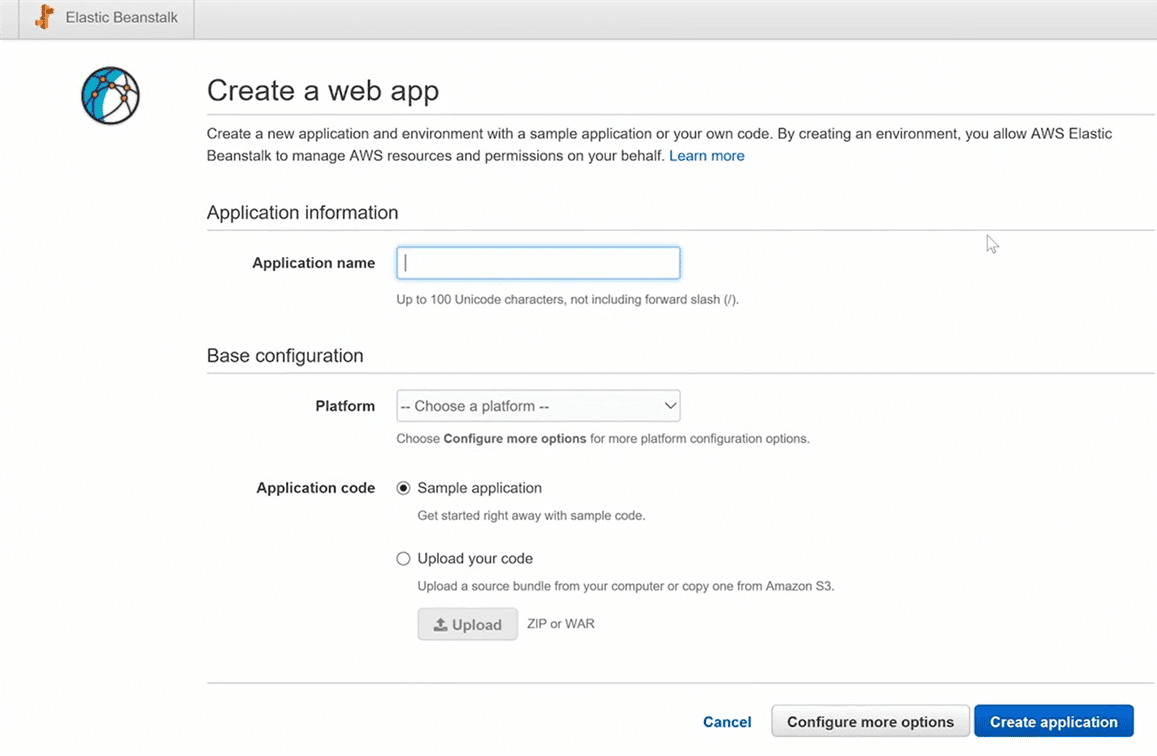
Step 4: Another dialog, you need to provide a domain name and description for your application.
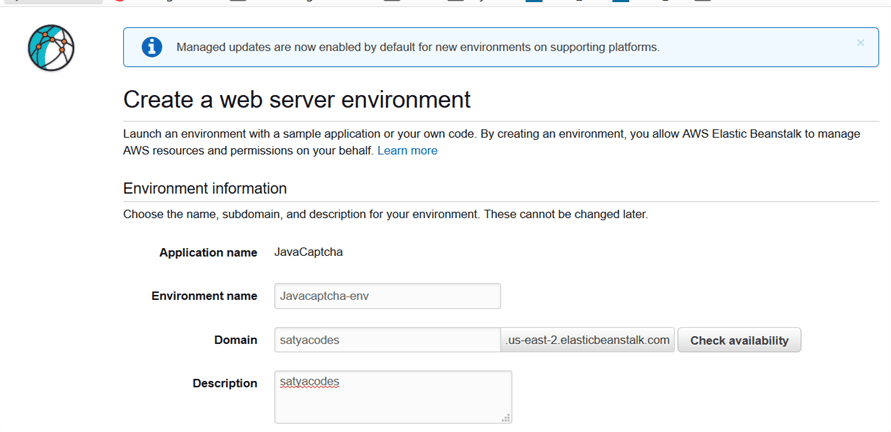
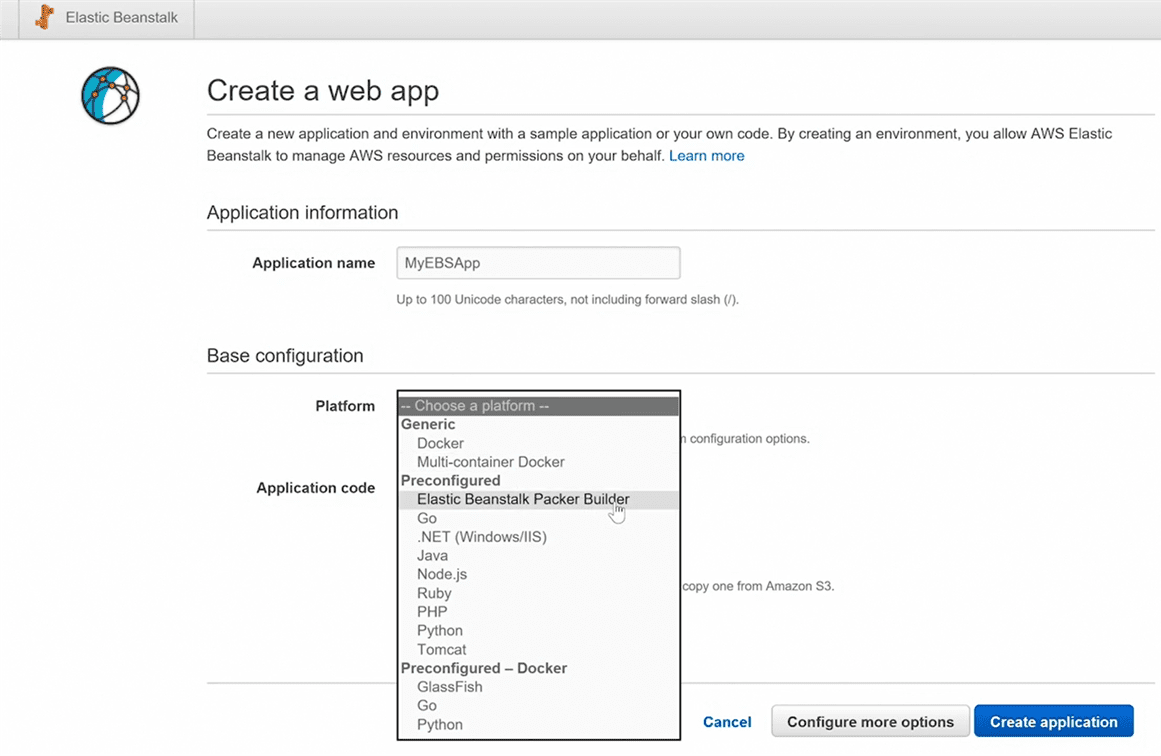
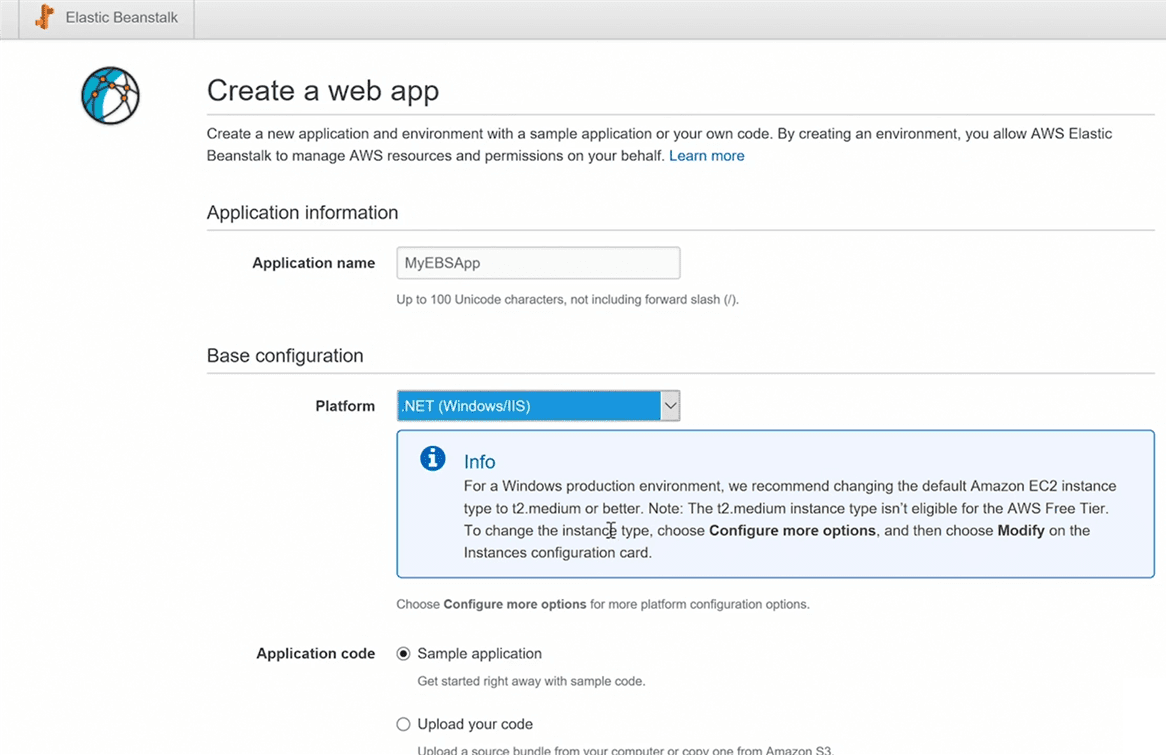
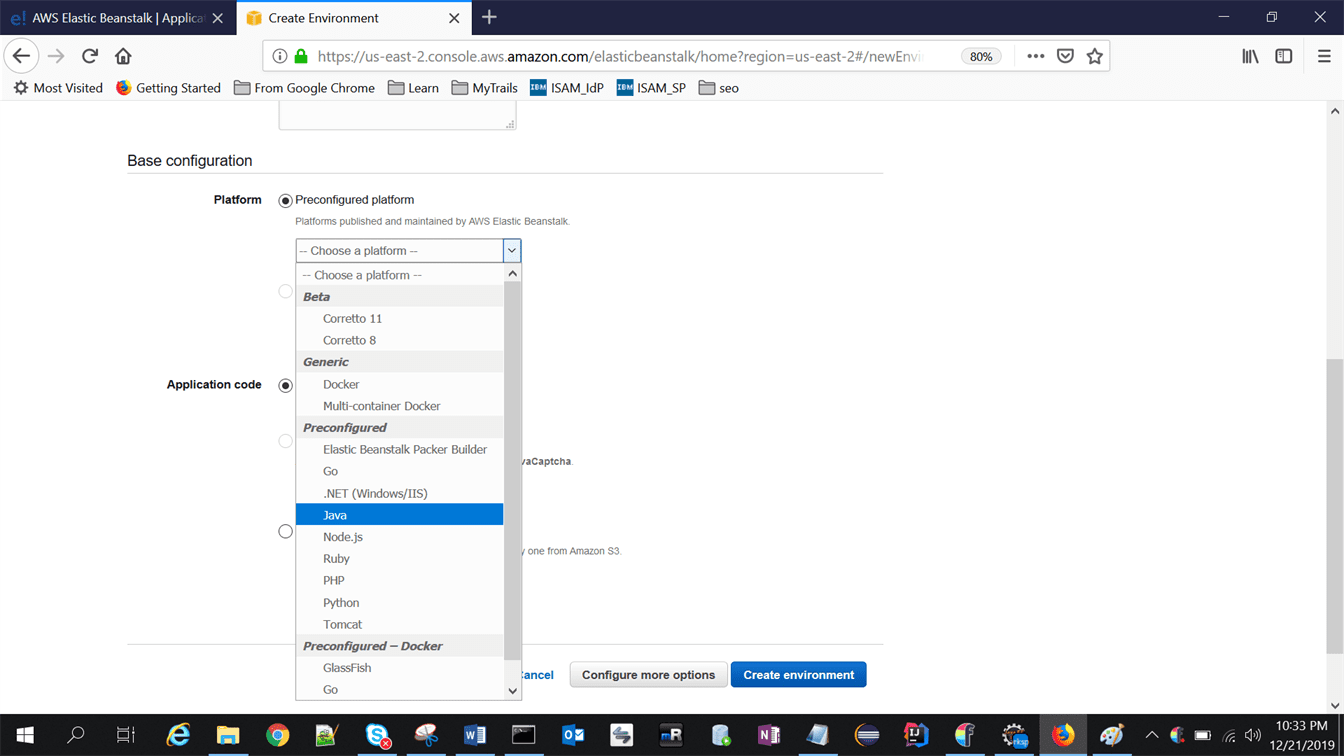
Step 5: Choose a platform of your choice for your application, like – java,.net, php etc. for me its Java.
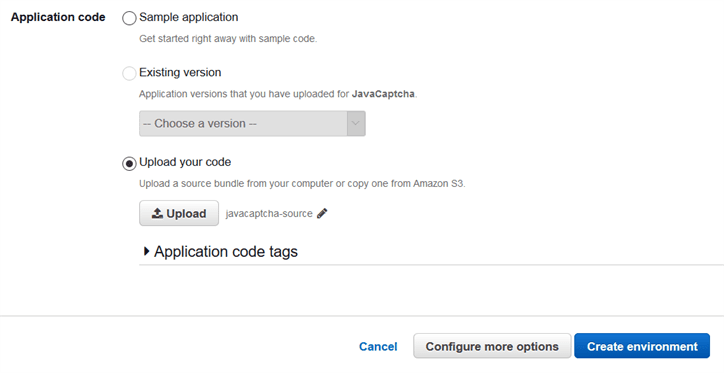
Step 6 : Application Code – choose a sample application provided by Beanstalk, or upload a file which has code for your application.
Step 7 : Click Create Enviroment, it will take some time to create environment.
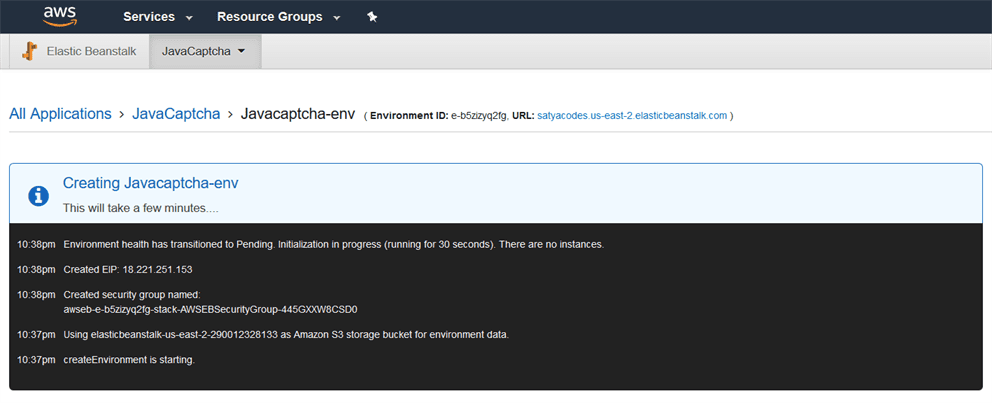
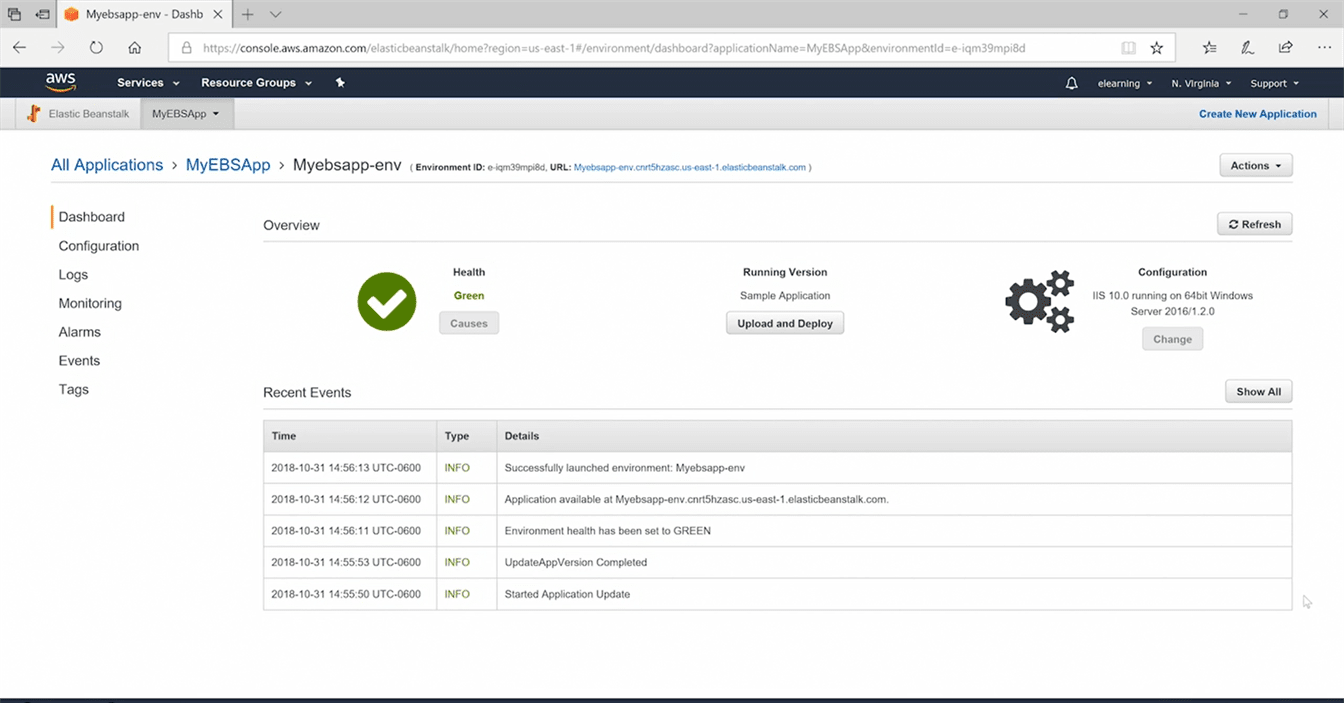
Step 8: On the top right corner, you will find the URL of your application version. http://satyacodes.us-east-2.elasticbeanstalk.com/