Docker Commands
Basic
docker version
Show the Docker version information
root@master:/home/vagrant# docker version
Client:
 Version:      1.9.1
 API version:  1.21
 Go version:   go1.4.3
 Git commit:   a34a1d5
 Built:        Fri Nov 20 17:56:04 UTC 2015
 OS/Arch:      linux/amd64

Server:
 Version:      1.9.1
 API version:  1.21
 Go version:   go1.4.3
 Git commit:   a34a1d5
 Built:        Fri Nov 20 17:56:04 UTC 2015
 OS/Arch:      linux/amd64
docker -v
Gives only docker version
root@master:/home/vagrant# docker -v
Docker version 1.9.1, build a34a1d5
docker –version
This command is used to get the currently installed version of docker
root@master:/home/vagrant# docker --version
Docker version 1.9.1, build a34a1d5
docker info
Displays more information about Docker Systems
root@master:/home/vagrant# docker info
Containers: 1
Images: 2
Server Version: 1.9.1
Storage Driver: aufs
 Root Dir: /var/lib/docker/aufs
 Backing Filesystem: extfs
 Dirs: 4
 Dirperm1 Supported: false
Execution Driver: native-0.2
Logging Driver: json-file
Kernel Version: 3.13.0-170-generic
Operating System: Ubuntu 14.04.6 LTS
CPUs: 1
Total Memory: 489.8 MiB
Name: master
ID: 4YPE:SJP3:JID3:IITF:F7V2:GMVH:UICM:Z5PI:GNAW:HMCV:W5IO:BFQK
WARNING: No swap limit support
docker –help
Shows details about particular command
Syntax
docker <command> --help
root@master:/home/vagrant# docker images --help

Usage:  docker images [OPTIONS] [REPOSITORY[:TAG]]

List images
  -a, --all=false      Show all images (default hides intermediate images)
  --digests=false      Show digests
  -f, --filter=[]      Filter output based on conditions provided
  --help=false         Print usage
  --no-trunc=false     Don't truncate output
  -q, --quiet=false    Only show numeric IDs
docker login
used to login with docker hub(http://hub.docker.com/) account.it will used to
pull/push our own docker images to server.
Images
docker images
List all the docker images pulled on the system with image details
>docker images
REPOSITORY                 TAG                 IMAGE ID            CREATED
httpd                      latest              ee39f68eb241        2 days ago
hello-world                latest              fce289e99eb9        6 months ago
sequenceiq/hadoop-docker   2.7.0               789fa0a3b911        4 years ago
docker pull
This command is used to pull images from the docker repository(hub.docker.com)
# Syntax:
docker pull <image name>

root@master:/home/vagrant# docker pull hello-world
Using default tag: latest
latest: Pulling from library/hello-world
30413dbcae18: Pull complete
cc813f1ee102: Pull complete
Digest: sha256:fb158b7ad66f4d58aa66c4455858230cd2eab4cdf29b13e5c3628a6bfc2e9f05
Status: Downloaded newer image for hello-world:latest

root@master:/home/vagrant# docker images
REPOSITORY          TAG                 IMAGE ID            CREATED             VIRTUAL SIZE
hello-world         latest              cc813f1ee102        14 months ago       1.84 kB
docker rmi
removes images by their ID. To remove the image, you first need to get the Image
ID By running simple command docker images -a
root@master:/home/vagrant# docker rmi -f cc813f1ee102
Deleted: cc813f1ee10243587aaa3ebd547ab6c7c284f509c8e8faa386d7b83ec935333a
Deleted: 30413dbcae18076edb8281917efa0a410e0dc0dba421aba37e767d2193827658
Containers
docker ps
This command is used to list the running containers
docker ps -a
This command is used to show all the running and exited containers

docker run
If it will check image is available in local system or not. If not, it will
download & run the image. If available, it will just Run the docker image.
In technical, this command is used to create a container from an image
root@master:/home/vagrant# docker run ubuntu
Unable to find image 'ubuntu:latest' locally
latest: Pulling from library/ubuntu

888ccf454ca2: Extracting [================>              ] 8.552 MB/26.69 MB
cc8ccfcd670f: Download complete
8569bb44e89d: Download complete
29734d14b16f: Download complete
68c4771c8a42: Download complete
docker run -it
In above it just downloaded Ubuntu image. To interact with it we should use
it(interactive -tty)
root@master:/home/vagrant# docker run -it ubuntu
root@8c70757a72c0:/# hostname
8c70757a72c0
docker start/stop
root@master:/home/vagrant# docker stop 8c70757a72c0
8c70757a72c0

root@master:/home/vagrant# docker start 8c70757a72c0
8c70757a72c0
System
docker stats
Gives container usage statistics
#> docker stats 8c70757a72c0

CONTAINER           CPU %               MEM USAGE / LIMIT     MEM %
8c70757a72c0        0.00%               442.4 kB / 513.6 MB   0.09%
docker system df
To check Disc usage of Docker
docker system prune
It will remove all unused data.(all stopped containers & its data)
Restart Docker
Restart the docker container with container id mentioned in the command.
#> docker restart 09ca6feb6efc
docker exec
This command is used to access the running container.
# Usage:
docker exec -it <container id> bash
9.docker stop
This command stops a running container
# Usage:
docker stop <container id>
10.docker kill
This command kills the container by stopping its execution immediately.
The difference between docker kill and docker stop is that docker stop
gives the container time to shutdown gracefully, in situations when it is taking
too much time for getting the container to stop, one can opt to kill it
# Usage:
docker kill <container id>
Cheetsheet
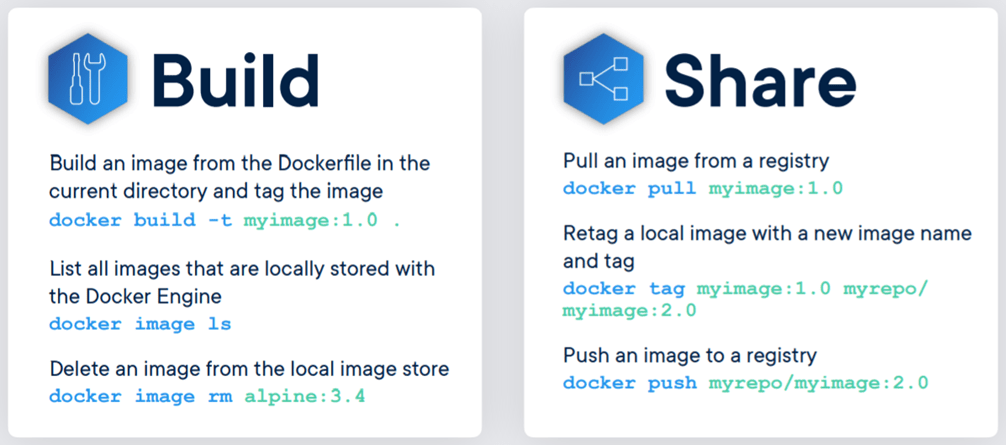
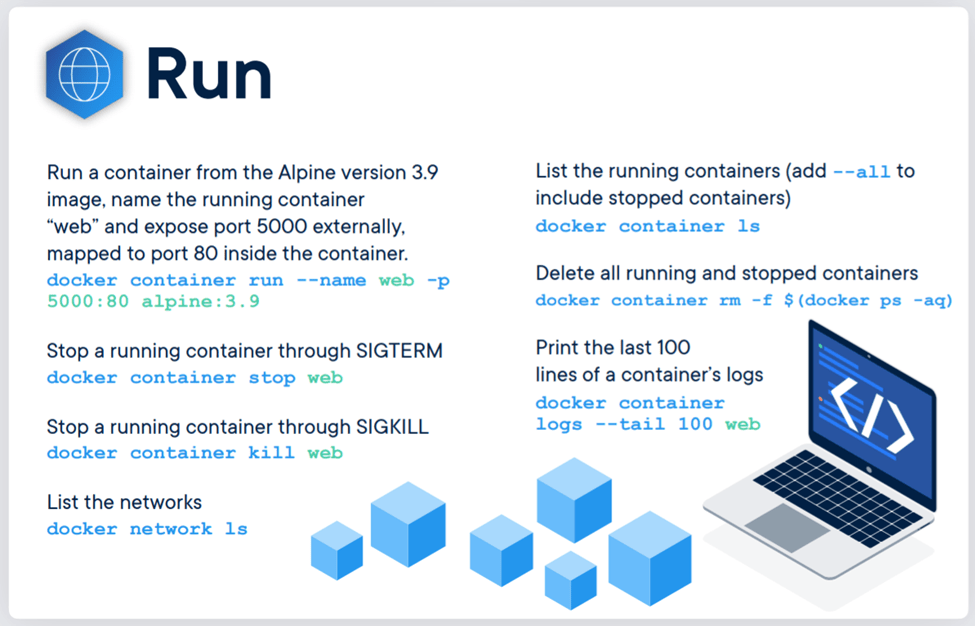
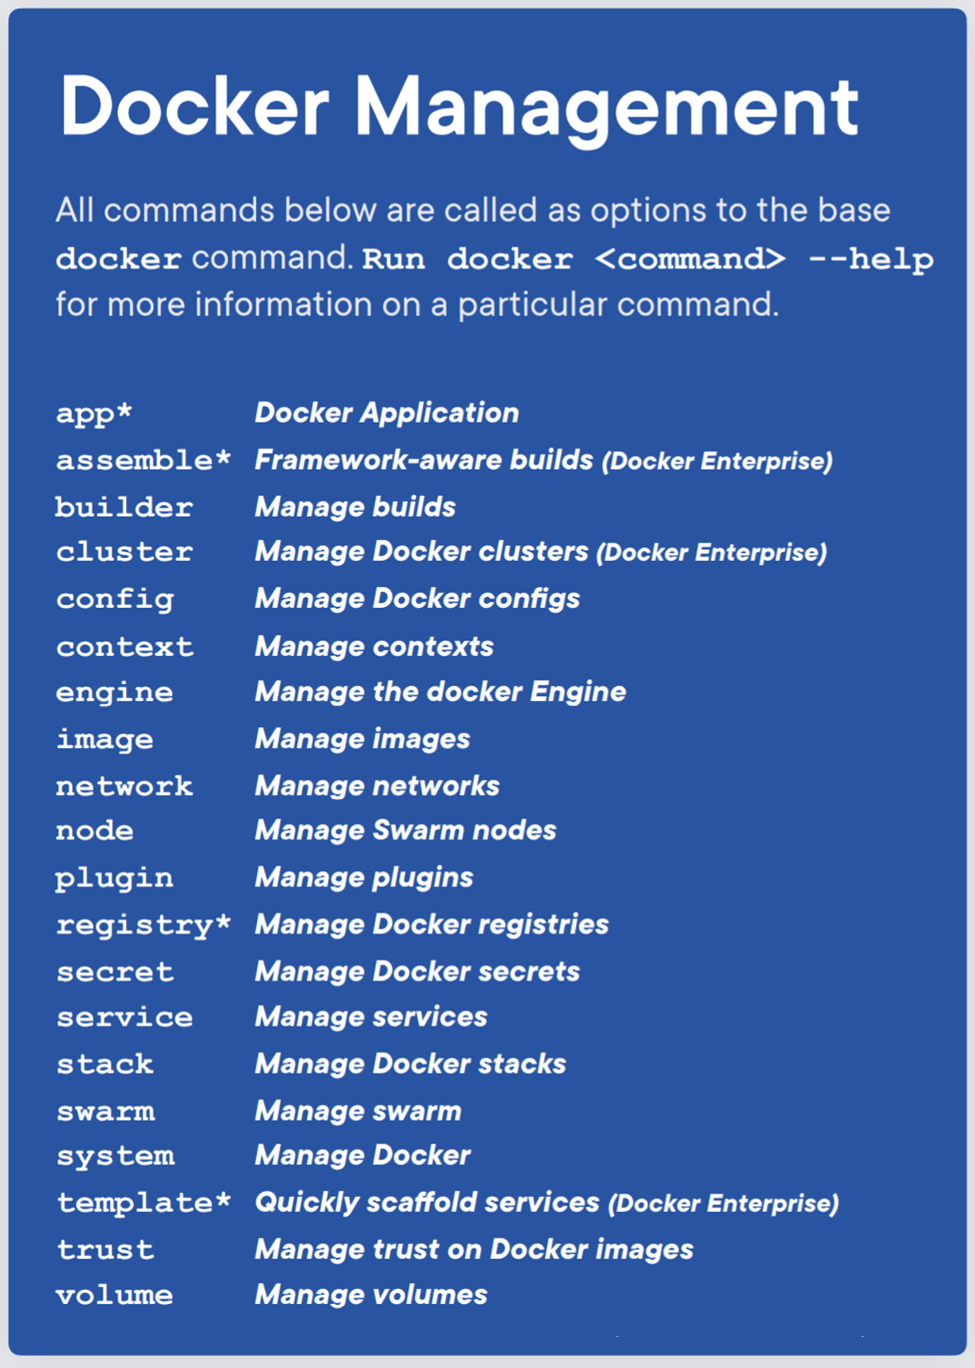
Quick Hands on
1. Building & Deploying Docker Image
1.Checkout this GITHUB project
https://github.com/smlcodes/Docker-SpringBoot-EmployeeServices.git
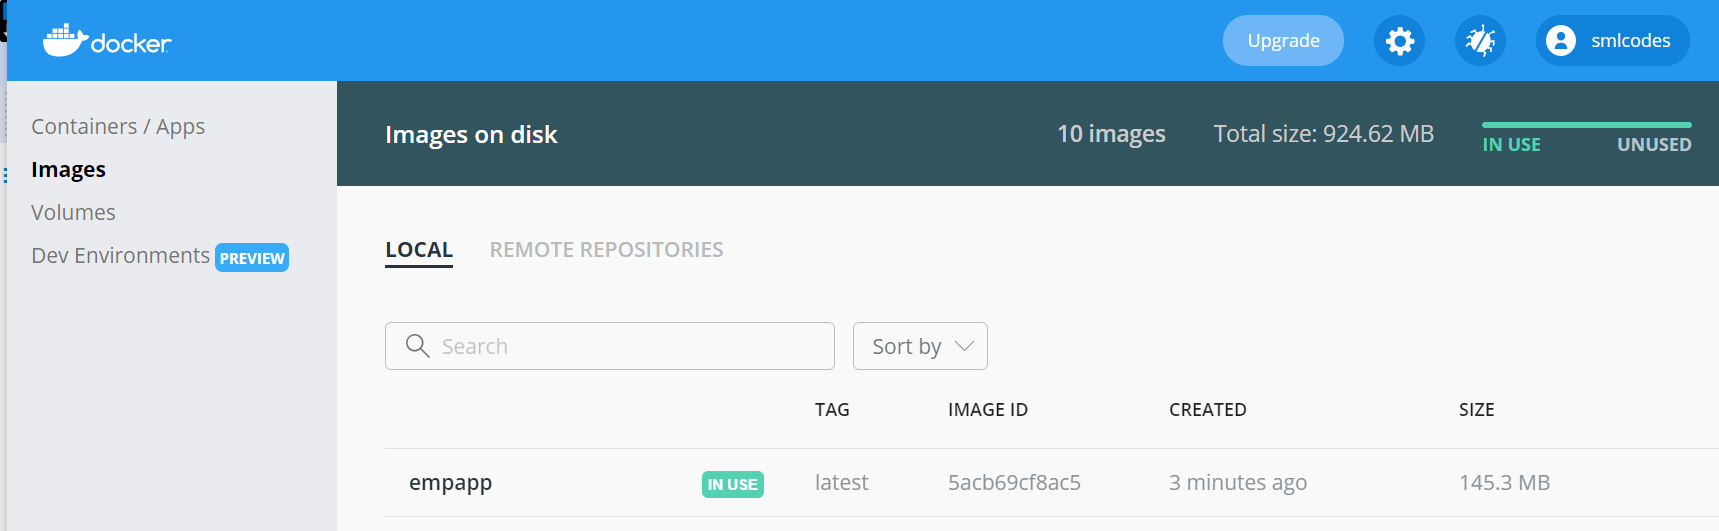
2.To Build the Image
docker build -t empapp .
You can see Image stored in Local Docker Registry, but not Running.
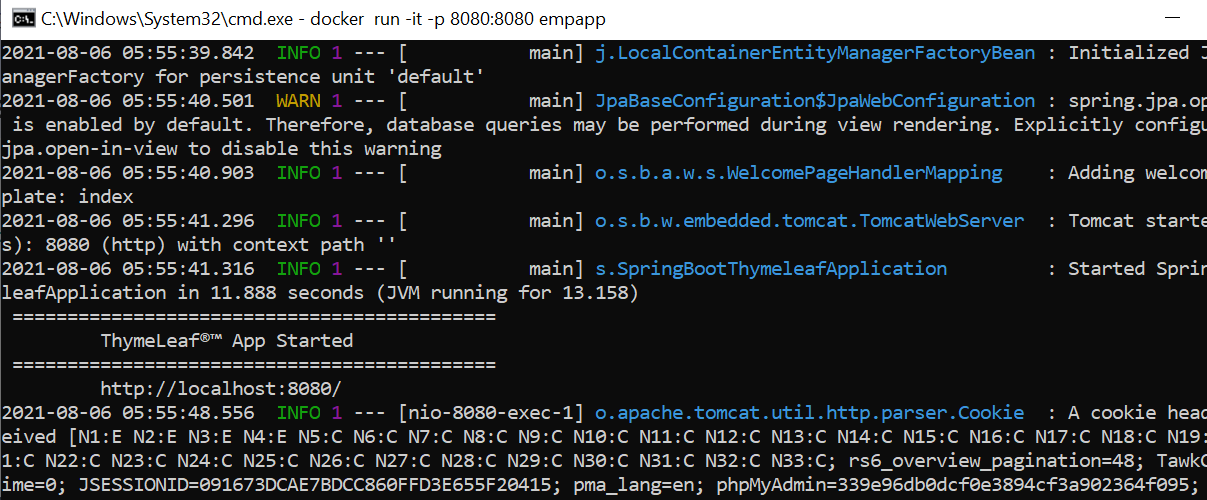
3.Run the Dokcer Imaage, Now its called as Docker Container.
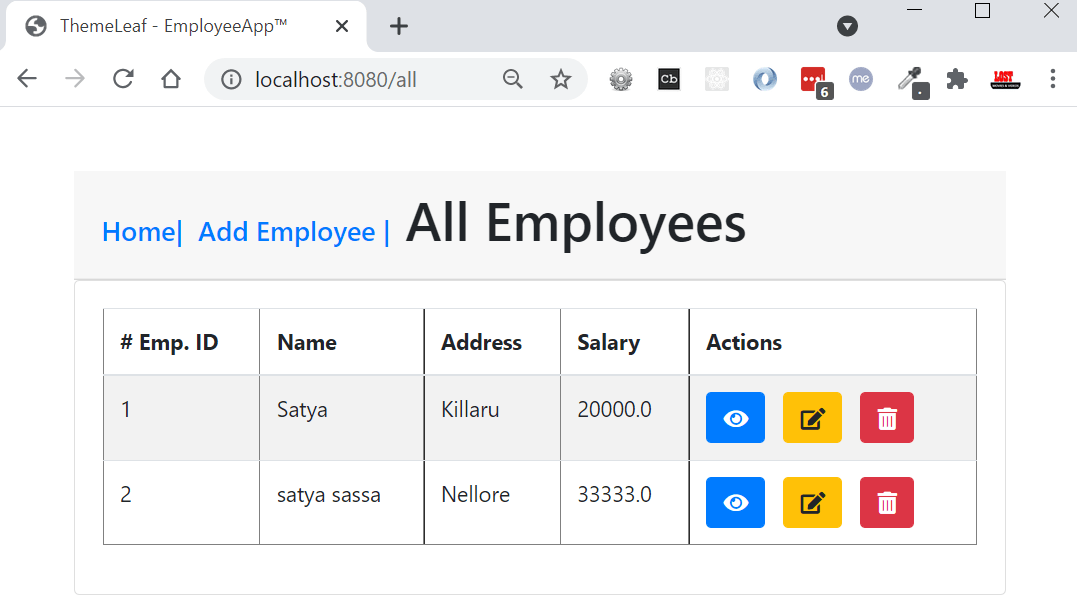
docker run -it -p 8080:8080 empapp
Open Application In Browser
4.Our App is Good. Its time to upload in DokcerHub. But before that we need to TAG the Image.
Syntax:
docker tag <Docker_Image_Name> YOUR_DOCKERHUB_NAME/<Docker_Image_Name>

docker tag empapp smlcodes/empapp
5.Now Push the tagged Image smlcodes/empapp to DockerHub
docker push smlcodes/empapp
Now it will create New Repo at DockerHub automatically & Stores Images inside with TAG.
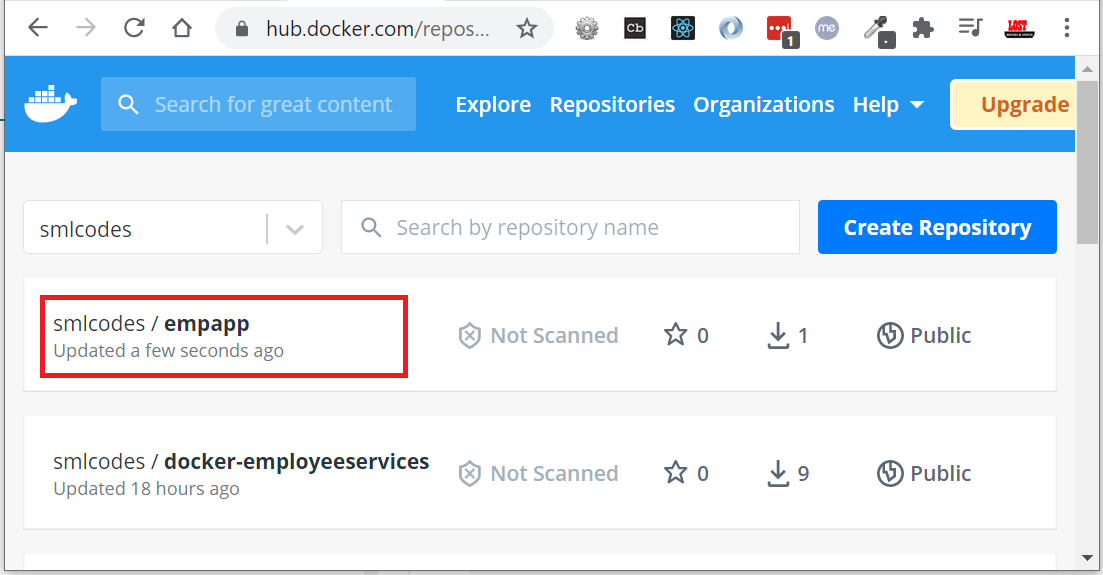
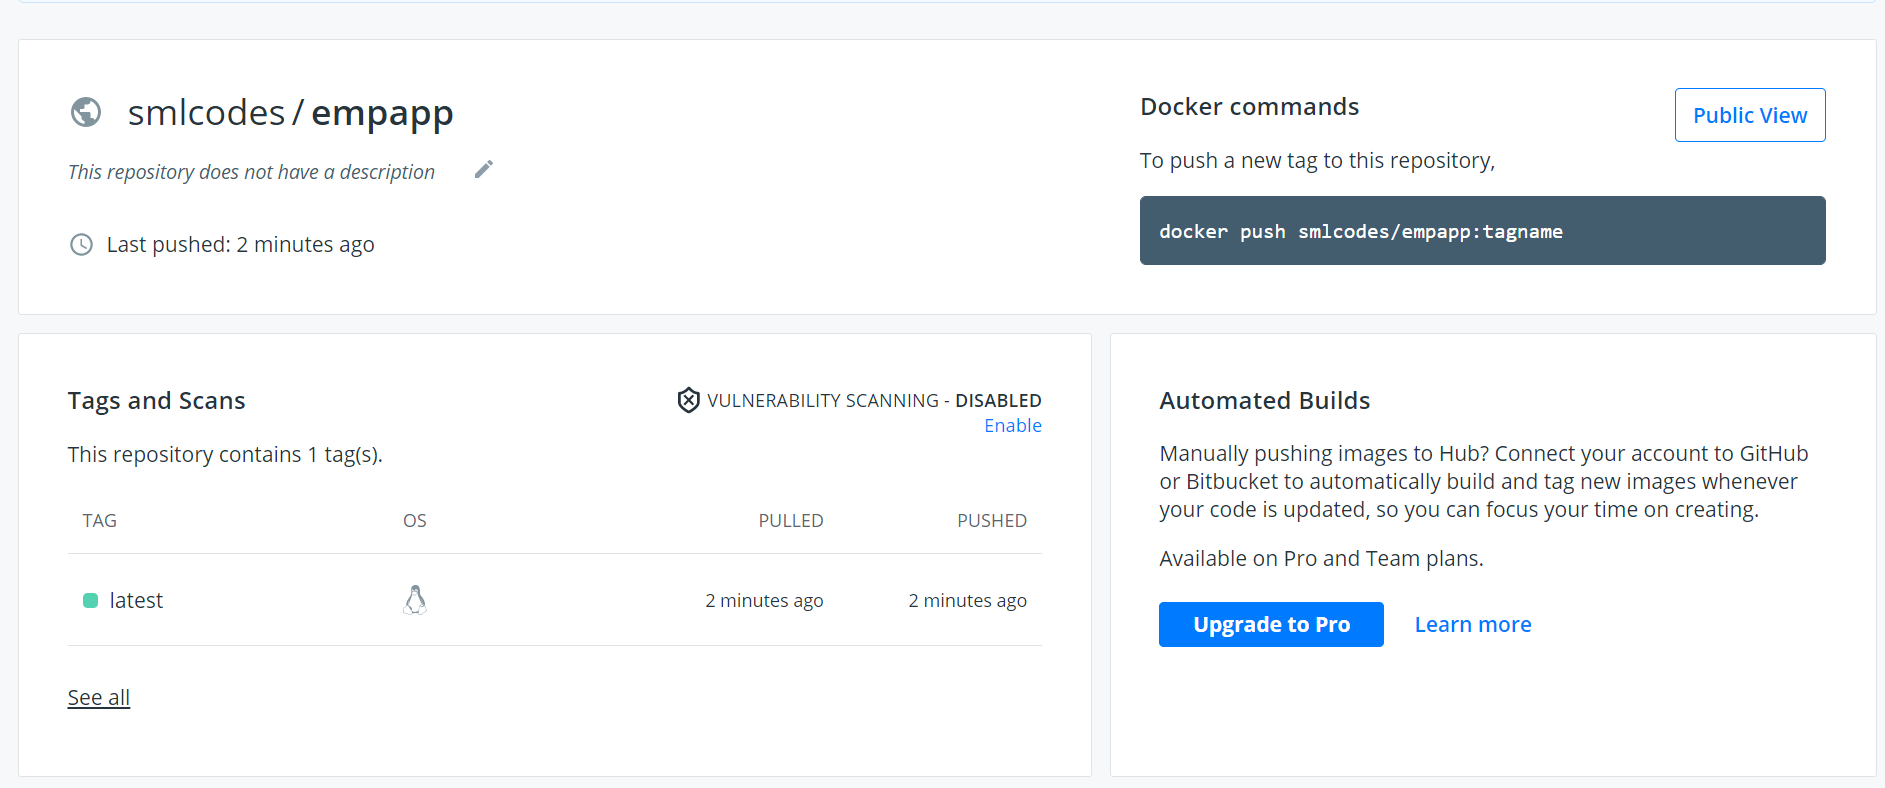
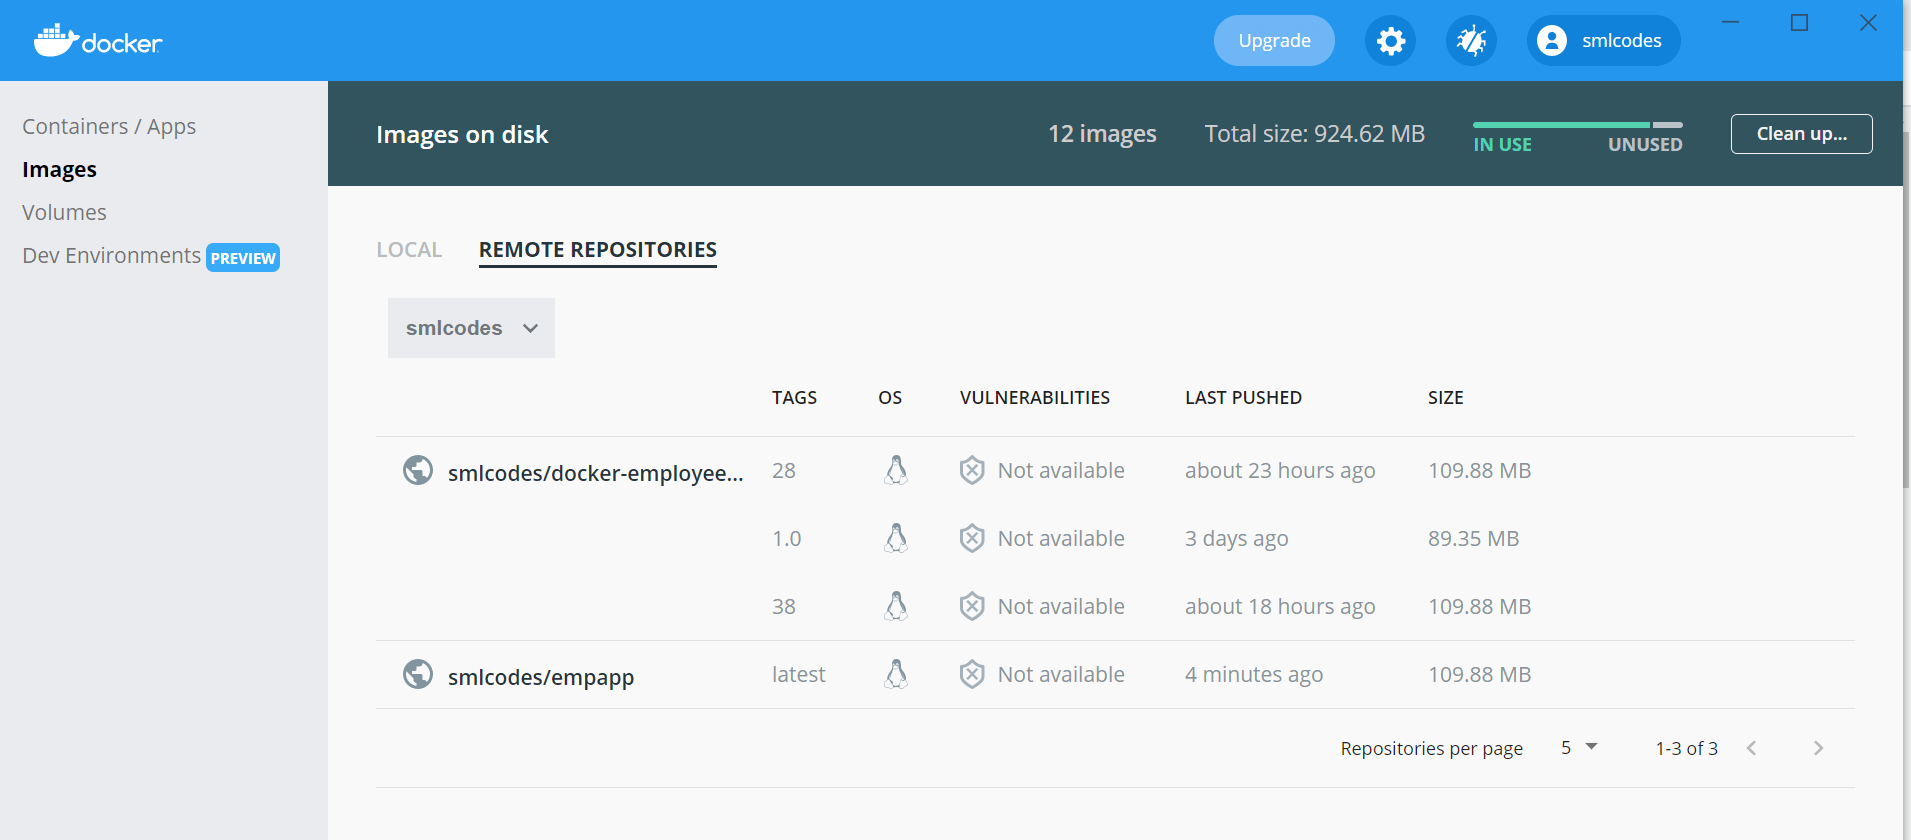
You can also check in Docker Desktop.
2. Docker + Kubernetes Integration
Kuberneters Architecture
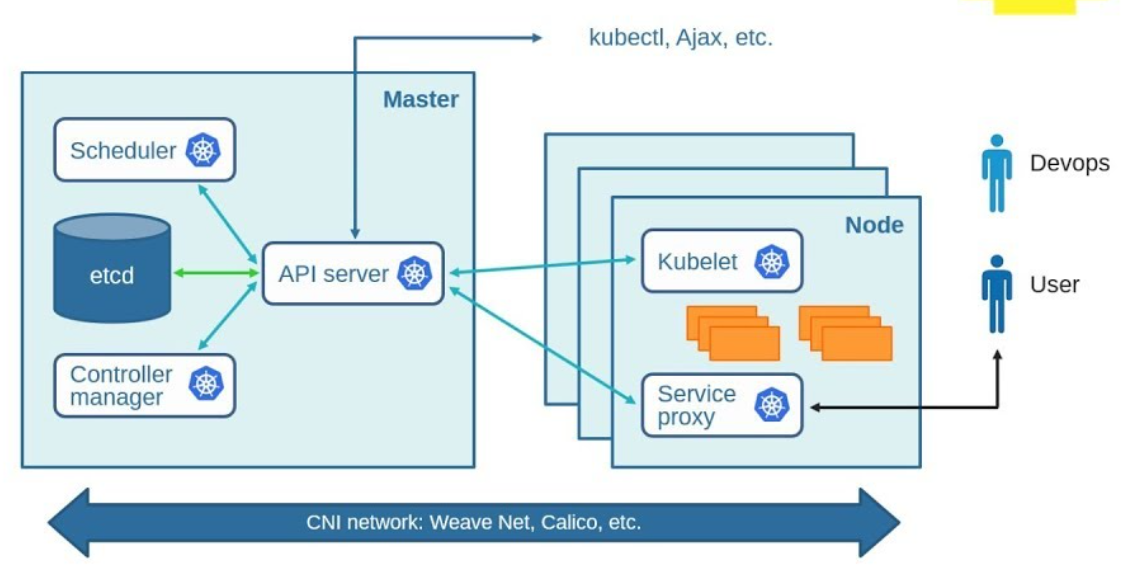
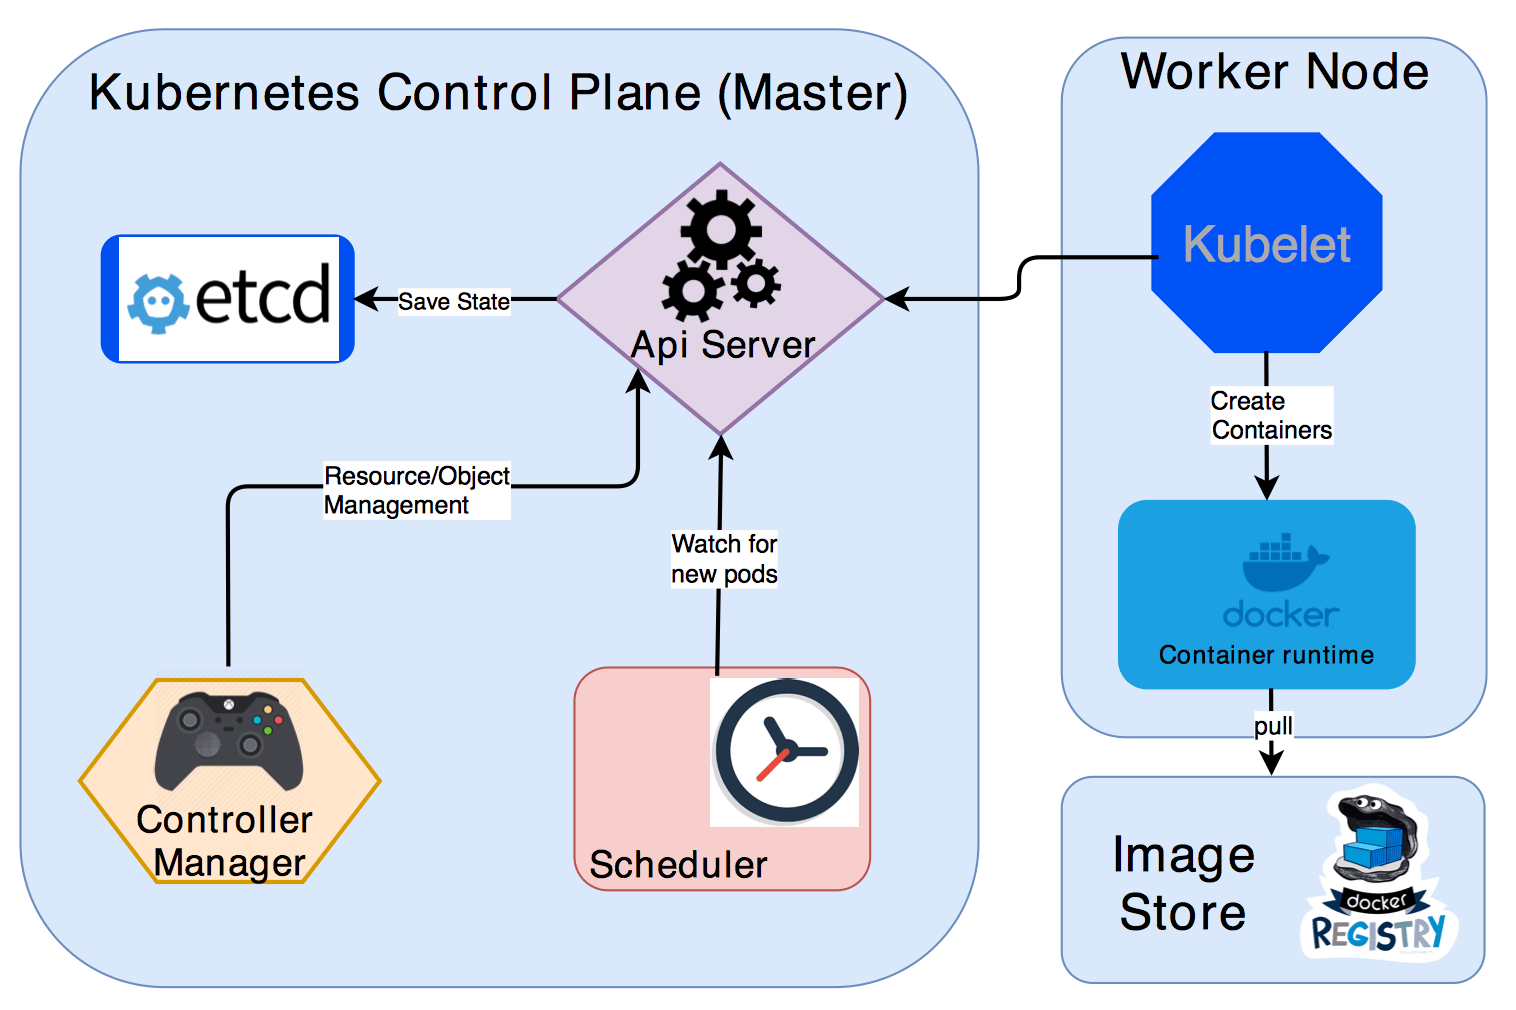
Kubernetes Master
-
kube-apiserver: REST API endpoint to serve as the frontend for the Kubernetes control plane
-
etcd: Key value store for the cluster data (regarded as the single source of truth)
-
kube-scheduler: Watches new workloads/pods and assigns them to a node based on several scheduling factors (resource constraints, anti-affinity rules, data locality, etc.)
-
kube-controller-manager: Central controller that watches the node, replication set, endpoints (services), and service accounts.
Node Components
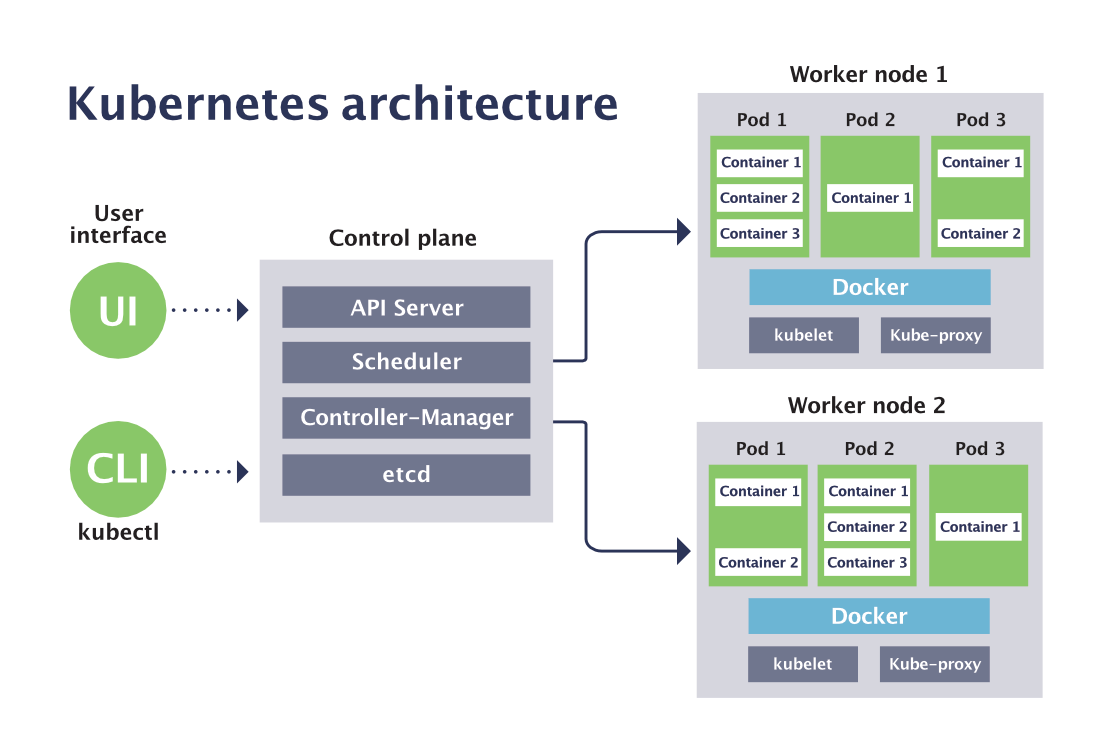 Unlike Master components that usually run on a single node (unless High Availability Setup is explicitly stated), Node components run on every node.
-
kubelet: Agent running on the node to inspect the container health and report to the master as well as listening to new commands from the kube-apiserver
-
kube-proxy: Maintains the network rules
-
container runtime: Software for running the containers (e.g. Docker, rkt, runc)
-
Nodesingle machine in your cluster -
PodsKubernetes doesn’t run containers directly; instead it wraps one or more containers into a higher-level structure called a pod. -
Master + Nodes = Kubernetes Cluster
In Simple,
- We have a Cluster
- Inside Cluster, we have POD
- Inside POD, We have a Container
- Running Cantainer called as a Service, which is accessed by hostname:port.
MiniKube Installation Windows 10
minikube is local Kubernetes, focusing on making it easy to learn and develop for Kubernetes.
All you need is Docker (or similarly compatible) container or a Virtual Machine environment, and Kubernetes is a single command away: minikube start
-
Download .exe from Here
- Open PowerShell as Administrator & Set Path by running below code
$oldpath=[Environment]::GetEnvironmentVariable("Path", [EnvironmentVariableTarget]::Machine) if($oldpath -notlike "*;C:\minikube*"){` [Environment]::SetEnvironmentVariable("Path", $oldpath+";C:\minikube", [EnvironmentVariableTarget]::Machine)` } - Start your cluster
minikube start --driver=hypervIf Any error Create Swith manually in Hyper-V Manager, Follow Here
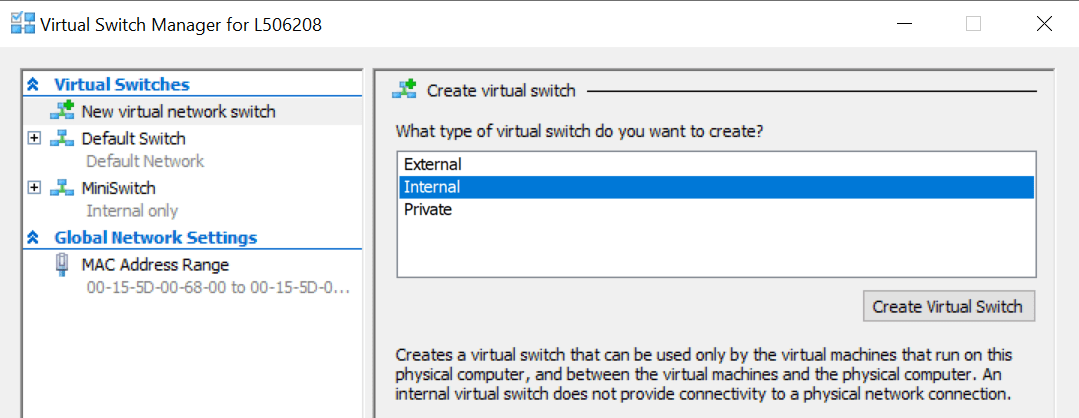
Run Below command
minikube start --vm-driver hyperv --hyperv-virtual-switch "MiniSwitch" - Install minikube Dashboard
minikube dashboard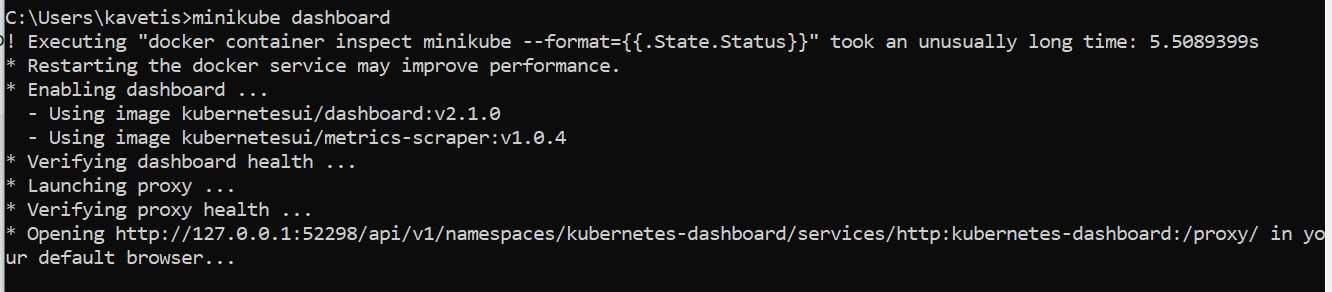
Open above URL in Browser
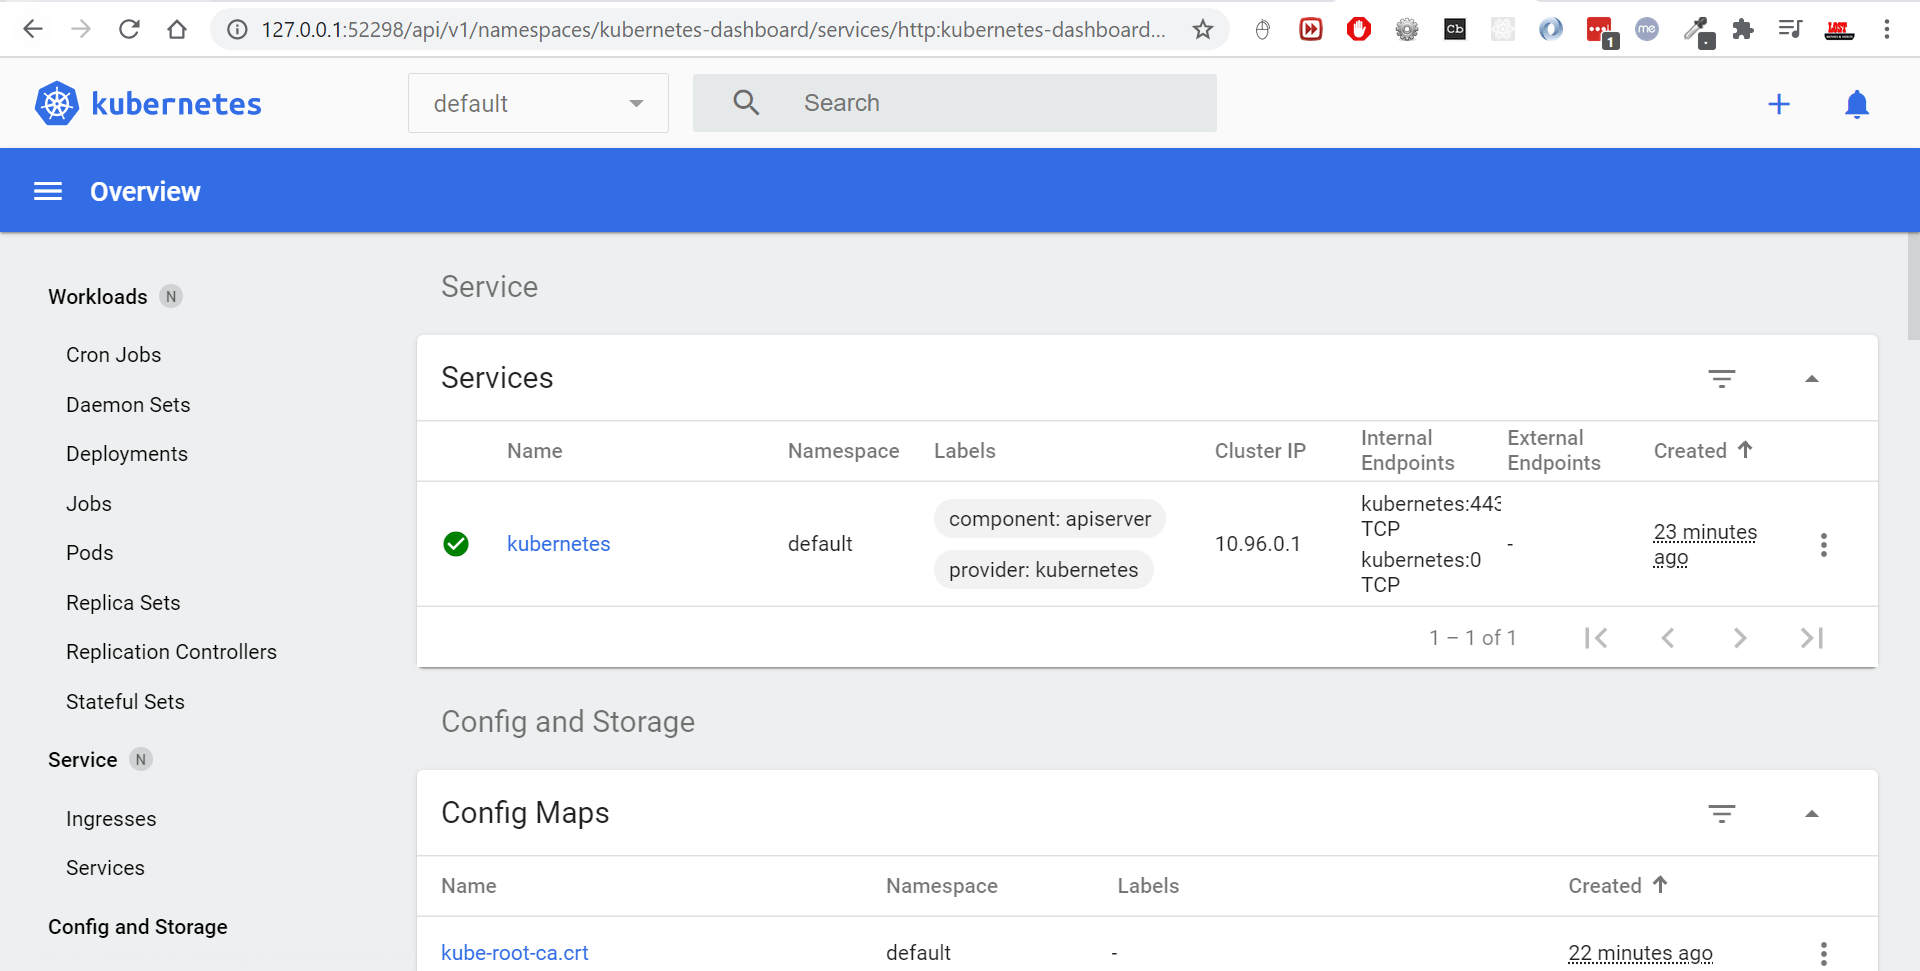
Create Pod.yaml
A POD can have one or more containers
1.Create pod.yaml in Project Root
apiVersion: v1
kind: Pod
metadata:
  name: pod1
  labels:
    app: java
spec:
  containers:
    - name: pod1
      image: smlcodes/empapp:latest
2.Check if any other PODS are running
kubectl get pods
No POD Resources are Running
3.Now Create POD, using below cmd where pod.yaml resides
kubectl create -f pod.yaml
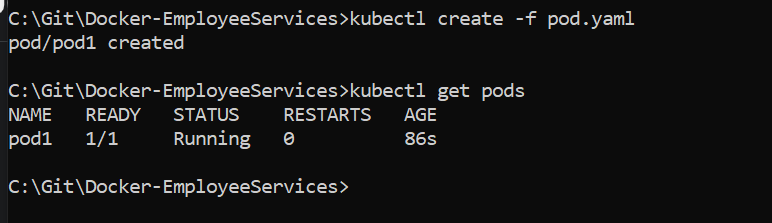
Now if we see Kubernetes Dashboard, You will find POD with one Node there
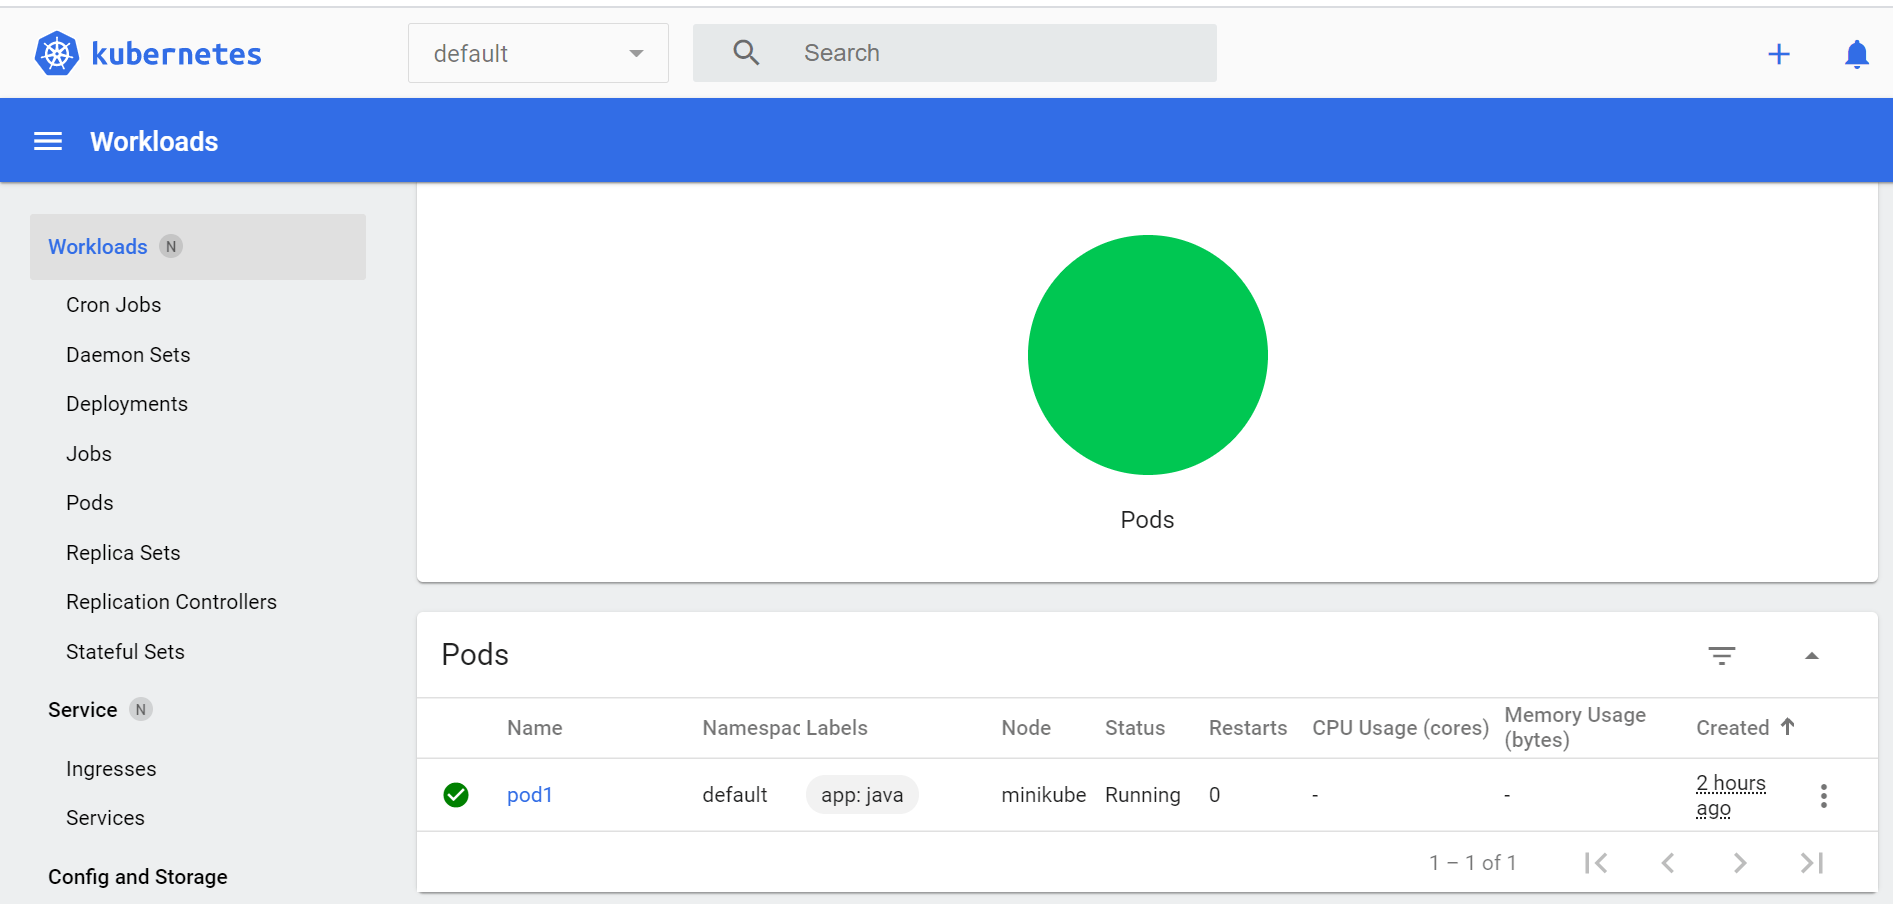
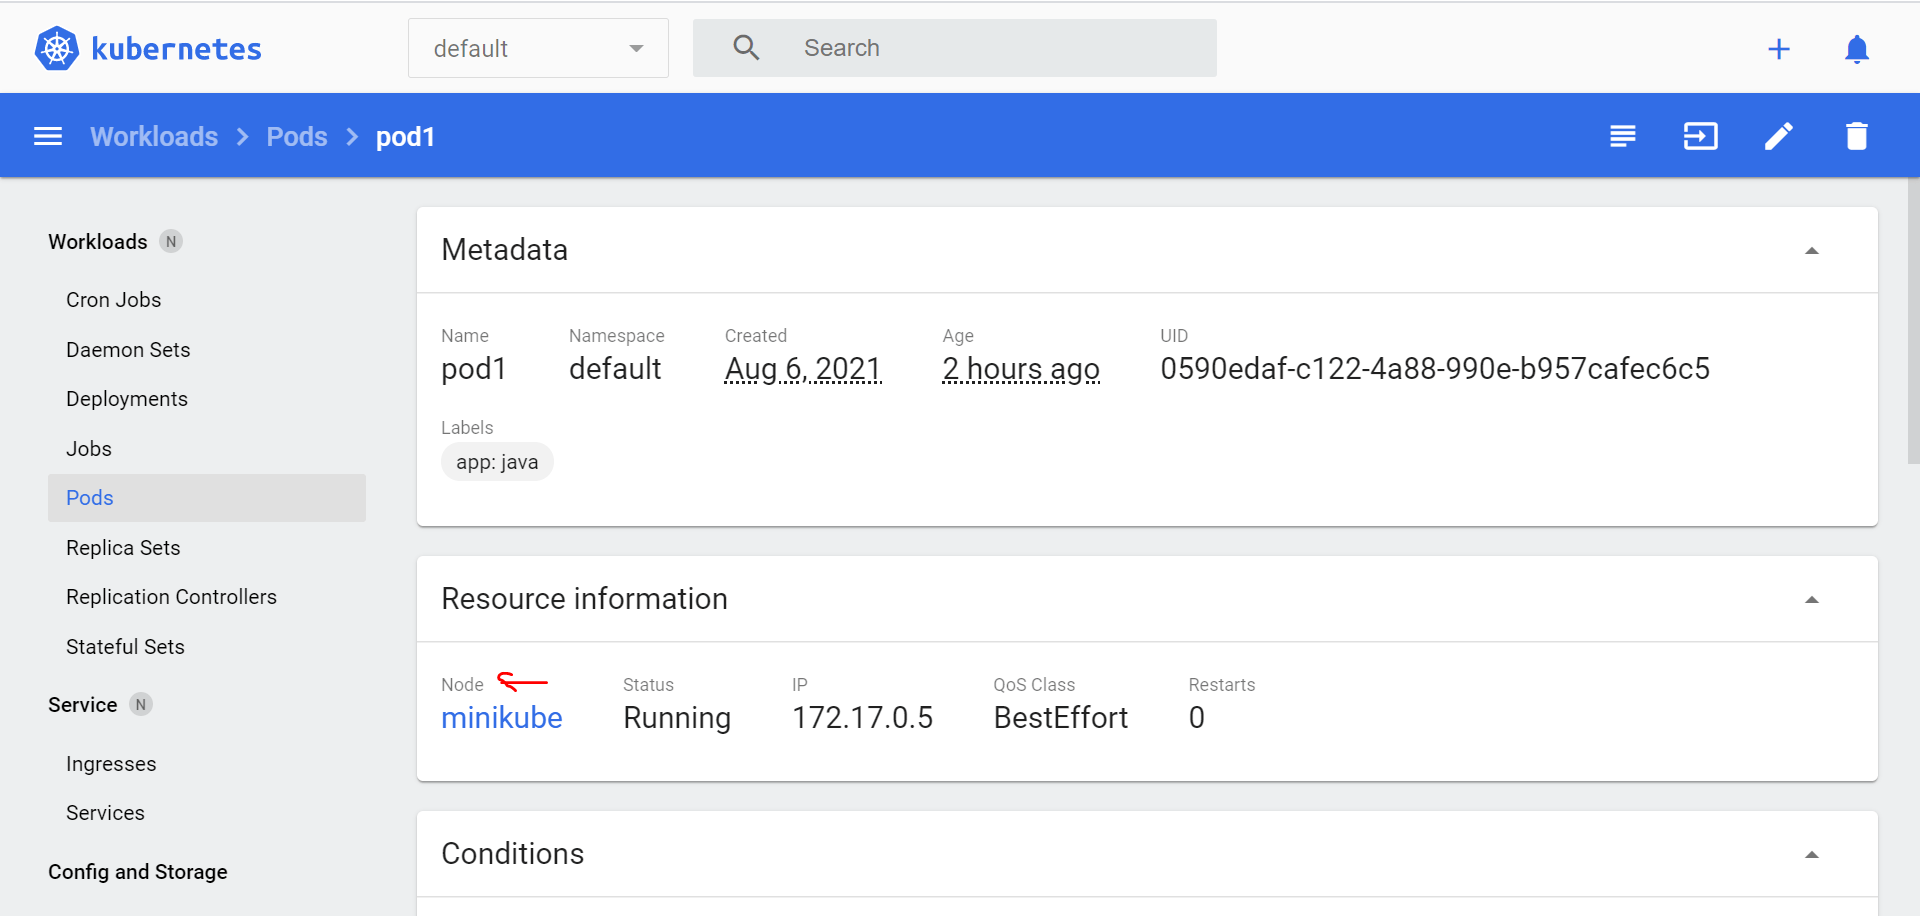
4.We have POD created, inside we have empapp container Running. To expose the application to outside world we need to do kubectl expose -h
Syntax:
kubectl expose pod <POD_NAME> --name <EXPOSE_SERVICE_NAME> --port <PORT_NO> --type [ClusterIP/NodePort/LoadBalancer]
kubectl expose pod pod1 --name pod1srv --port 5001 --type NodePort

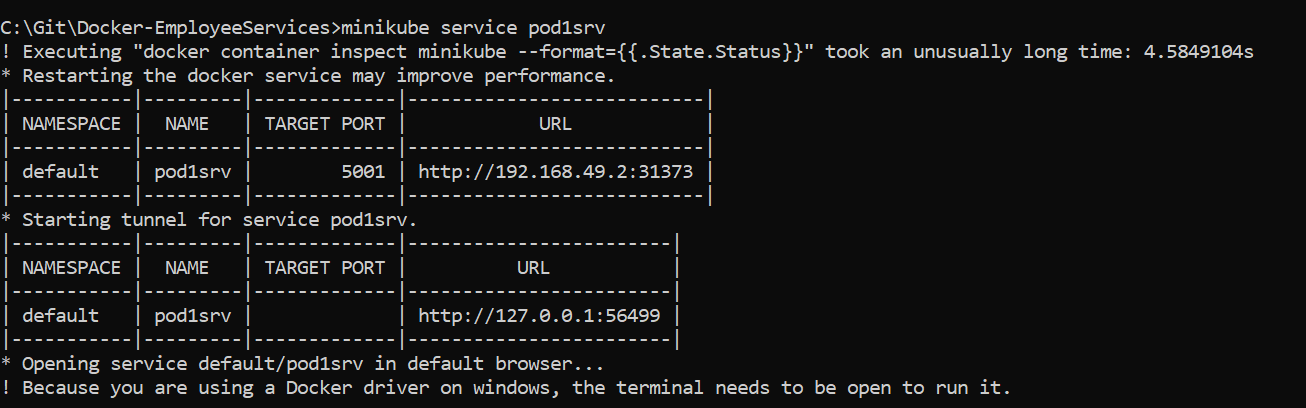
5.To access Application, we must know the IP/host where pod1srv service is Running. for that we use below one.
minikube service pod1srv