Chef – Roles
So far, we’ve been just adding recipes directly to a single node. But that’s not how your infrastructure works.
Roles are there in Chef to group nodes with similar configuration. Typical cases are to have roles for web servers, database servers, and so on.
Roles make it easy to configure many nodes identically without repeating yourself each time
In your organization, if your infrastructure grows to be multiple, redundant servers that all perform the same basic tasks. For instance, these might be web servers that a load balancer passes requests to. They would all have the same basic configuration and could be said to each satisfy the same -role”.
You can set custom run lists for all the nodes in your roles and override attribute values from within your roles.
Creating Roles
For creating any role we need to follow below steps
-
Create a role
-
Upload the role on the Chef server
-
Update Run list
-
Assign the role to the nodes
-
Run the Chef client
we can create Role in two ways
- Using Knife [JSON]- Create Role in Chef Server directly
- Using Ruby - In local repo under chef-repo folder
1.Using Knife [JSON]- Create Role in Chef Server directly
1.Create a role
knife role create <ROLE_NAME>
2.Update Run list
{
   "name":"client1",
   "description":"",
   "json_class":"Chef::Role",
   "default_attributes":{

   },
   "override_attributes":{

   },
   "chef_type":"role",
   "run_list":[
      "recipe[nginx]",
      "recipe[phpapp::web]"
   ],
   "env_run_lists":{

   }
}
3.Upload the role on the Chef server
By closing Knife will auto save with Chef Server. To check
knife role show <ROLE_NAME> -d -Fjson
4.Assign the role to the nodes
knife node run_list set Node2 "role[<ROLE_NAME>]"
5.Run the Chef client
sudo chef-client
2.Using Ruby - In local repo under chef-repo folder
1.Create a role
Create a role folder inside chef-repo & create webserver.rb file with runlists.
name "web_server"
description "Role for web servers"
run_list("role[base]", "recipe{web_server]")
2.Upload the role on the Chef server
knife role from file chef-repo/roles/webserver.rb
3.Update Runlist
Already Did at Step #1
4.Assign the role to the nodes
knife node edit <node_name>
5.Run the Chef client
sudo chef-client
Create Role for Webserver
we are creating a Role; it consists of following recipes. we download these from Supermarket.
knife supermarket download apt
knife supermarket download nginx
knife supermarket download ohai

#Exatract It
tar -zxxvf  -C cookbooks/

#upload Cookbooks
knife cookbook upload apt/nginx/ohai
Each role file can be written either in Ruby, or in JSON.
Create a roles directory in chef-repo:
$ mkdir roles
We’re going to create a .json file representing the role data. A basic role has a
-
name:
-
description: and
-
run_list:
-
a long list of recipes
Create a Role for Web Server: Ruby
vi web_server.rb
Start with Name of the Roles & Description: what this role for
name "web_server"
description "A role to configure our front-line web servers"
Next, we can specify the runlist, contain cookbooks (recipe[“
name "web_server"
description "A role to configure our front-line web servers"
run_list "recipe[apt]", "recipe[nginx]"
To Upload Role to Chef Server manually, using below command
knife role from file web_servers.rb
Create a Role Using JSON
To create a webserver role:
knife role create webserver
It should look something like this:
{
  "name": "test",
  "description": "",
  "json_class": "Chef::Role",
  "default_attributes": {
  },
  "override_attributes": {
  },
  "chef_type": "role",
  "run_list": [

  ],
  "env_run_lists": {
  }
}
When we save a JSON file created using the knife command, the role is created on the Chef server. But for Ruby.rb, we need to Upload Role to Chef Server manually
Change json file it as per Our Role
{
  "name": "webserver",
  "description": "A role to configure our front-line web servers",
  "json_class": "Chef::Role",
  "default_attributes": {
    "nginx": {
      "log_location": "/var/log/nginx.log"
    }
  },
  "override_attributes": {
    "nginx": {
      "gzip": "on"
    }
  },
  "chef_type": "role",
  "run_list": [
    "recipe[apt]",
    "recipe[nginx]"
  ]
}
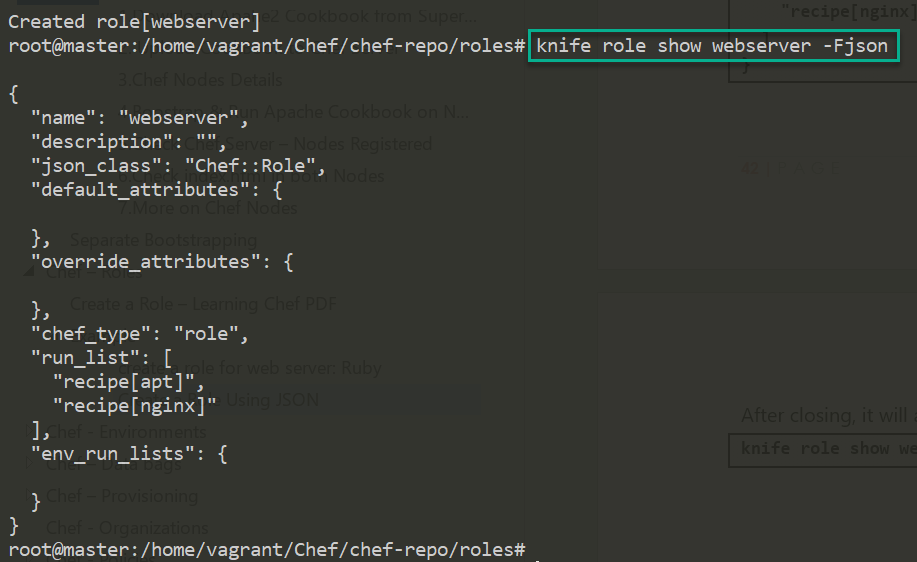
After closing, it will automatically Saved in Chef Server. If we want to get our JSON file from the server.
knife role show webserver -Fjson

Add Role to a Node
Now we need to add our role to a node. For that first find list of nodes
available
knife node list

Node1
Node2
And then we would give a command like:
knife node edit <node_name>
knife node edit Node1
This will show the node’s definition file, which will allow us to add a role to its run_list:
{
  "name": "Node1",
  "chef_environment": "_default",
  "normal": {
    "tags": [

    ]
  },
  "run_list": [
    "recipe[nginx]"
  ]
}
Now, we need to replace our recipe with our role in this file:
{
  "name": "Node1",
  "chef_environment": "_default",
  "normal": {
    "tags": [

    ]
  },
  "policy_name": null,
  "policy_group": null,
  "run_list": [
  "role[webserver]"
]

}
On close, it will automatically update Node1 run list with newly assigned role.
We can also do this in single command
knife node run_list set Node2 "role[webserver]"

Run the Chef-Client
Login to Node1, run chef-client to
