Chef - Environments
Having separate environments for development, testing, and production are good ways to be able to develop and test cookbook updates and other configuration changes in isolation.Chef enables grouping nodes into separate environments to support an ordered development flow.
Every Chef Server starts out with a single environment, the _default environment
The Chef server always has an environment called _default, which cannot be edited or deleted. All the nodes go in there if you don’t specify any other environment.
For Example, if you want one configuration for Development, one for Testing, & one for Production - we will do this by Environments.
Creating New Environment
1. Create new Environment
To Create new Environment, we need to create environments directory inside -chef-repo”.This is where we should put our environment files.
cd ~/chef-repo/environments
To create any environment, we need to place that environment specific configuration inside Environments folder. Here I’m creating `development` environment
vi development.rb
In this file you can specify cookbooks and their version constraints, and recipes that are deployed.so it contains
-
name
-
description
-
cookbook_versions
-
override_attributes
#development.rb
name "development"
description "The master development branch"
cookbook_versions({
    "nginx" => "<= 1.1.0",
    "apt" => "= 0.0.1"
})
override_attributes ({
    "nginx" => {
        "listen" => [ "80", "443" ]
    },
    "mysql" => {
        "root_pass" => "root"
    }
})
We could also use the JSON format. The knife tool can generate the template of an environment file by typing. Provide default editor export EDITOR=vi
knife environment create development
This will open our editor with a preloaded environment file with the name filled in.
# Def. Generated File
{
  "name": "development",
  "description": "",
  "cookbook_versions": {

  },
  "json_class": "Chef::Environment",
  "chef_type": "environment",
  "default_attributes": {

  },
  "override_attributes": {

  }
}
We need to edit with our details
{
  "name": "development",
  "description": "The master development branch",
  "cookbook_versions": {
    "nginx": "<= 1.1.0",
    "apt": "= 0.0.1"
  },
  "json_class": "Cheff:Environment",
  "chef_type": "environment",
  "default_attributes": {
  },
  "override_attributes": {
    "nginx": {
      "listen": [
        "80",
        "443"
      ]
    },
    "mysql": {
      "root_pass": "root"
    }
  }
}
2.Upload Environment Files to/from the Server
We could upload our Ruby file to the Chef server by typing this:
knife environment from file ~/chef-repo/environments/development.rb
For our JSON file, we can get the environment file off of the server by typing something like:
knife environment show development -Fjson > ~/chef-repo/environments/development.json
Now check all the environments Configured in Chef Server
knife environment list

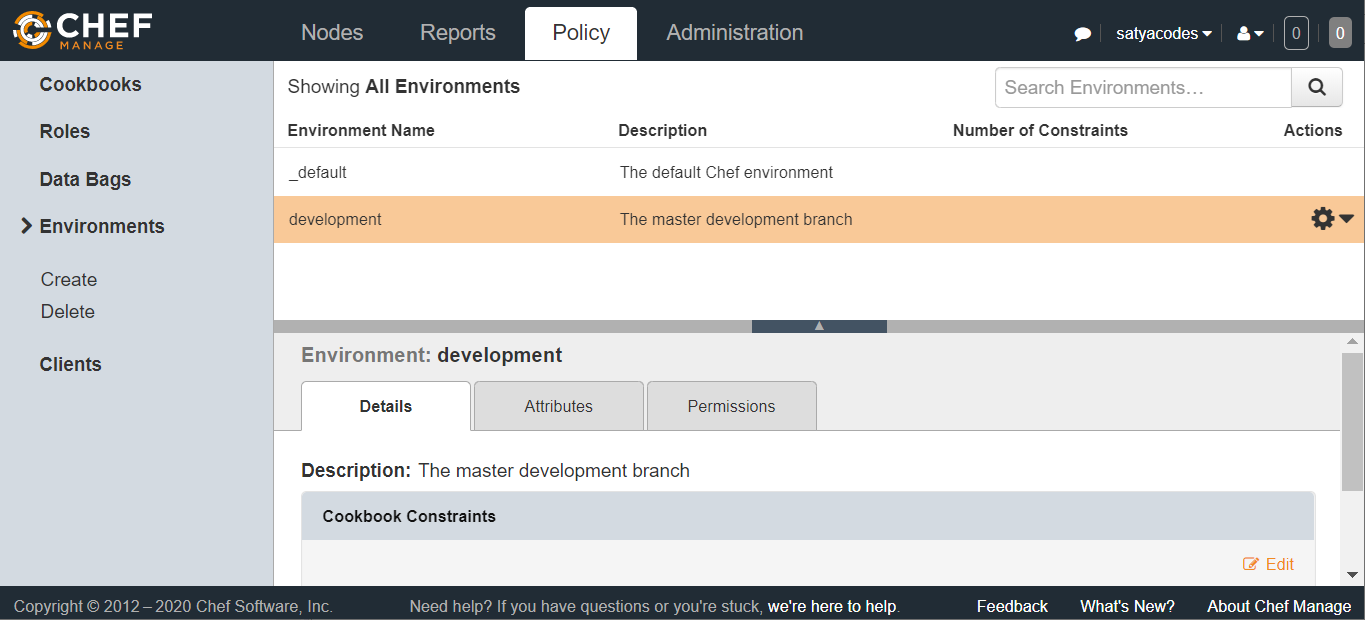
You can also check in Chef Server

3.Setting Environments in Nodes
Each node can be in exactly one environment. we need to edit its node environment information by using node edit <node>.
knife node edit <Node1>
This will open up a JSON formatted file with the current node parameters:
{
{
  "name": "Node1",
  "chef_environment": "_default",
  "normal": {
    "tags": [
    ]
  },
  "policy_name": null,
  "policy_group": null,
  "run_list": [
  "role[webserver]"
]
}
As you can see, the chef_environment is set to _default originally. We can simply modify that value to put the node into a new environment.
"chef_environment": "development"
4.Run chef-client
run chef-client on the node, it will pick up the new attributes and version constraints and modify itself to align with the new policy