Chef – Knife
knife is a command-line tool that provides an interface between a local chef-repo and the Chef Infra Server. knife helps users to manage:
-
Nodes
-
Cookbooks and recipes
-
Roles, Environments, and Data Bags
-
Resources within various cloud environments
-
The installation of Chef Infra Client onto nodes
-
Searching of indexed data on the Chef Infra Server
Knife Subcommands
knife includes a collection of built in subcommands that work together to provide all of the functionality required to take specific actions against any object in an organization, including cookbooks, nodes, roles, data bags, environments, and users.
All knife subcommands have the following syntax:
knife subcommand [ARGUMENT] (options)
Knife Bootstrap
You use the knife bootstrap subcommand to install the chef-client on Chef Nodes. The bootstrap process also registers the Nodes with the Chef server to facilitate communication between the two.
you would use a command like knife
knife bootstrap 192.168.10.44
This instructs knife to install the chef-client on the system with the IP address 192.168.10.44, register that system with the Chef server, and create a node representing the system on the Chef server.
Knife Node
The knife node subcommand is used to query and set the various configuration values for a node.
Knife Diff
Knife diff is used to compare the files in your current Workstation repo with what is stored on the Chef server.
Knife Exec
Exec is a knife subcommand that lets you run Ruby scripts against the Chef server in the context of a fully configured chef-client,
knife exec -E 'nodes.transform("chef_environment:_default") { |n| n.chef_environment("development") }'
Knife SSH
The knife ssh subcommand lets you run ssh commands on all or a subset of the nodes known to your Chef Server.
knife ssh "chef_environment:production" "uptime" -p 2222 -x earl -PMyPW99
Knife Search
knife search lets you do queries against all of the data stored in the Chef server.
Knife Windows plugin
We use the knife Windows plugin when we are working with nodes running the Windows operating system
# Installing the Knife Windows plugin on Master
chef gem install knife-windows


# Bootstrapping a Windows node
knife bootstrap windows winrm node03 -p 55985 -x Administrator -P MyPW99 -r 'recipe[winbase]'
Knife EC2 plugin
This plugin is used to integrate knife with Amazon cloud instances that allow you to create and manage instances from the command line.
Installing the Knife EC2 plugin
chef gem install knife-ec2
The knife EC2 plugin requires some specific data related to your Amazon account. to add the Amazon data to your knife.rb file, it should be added in this format:
knife[:aws_access_key_id] = "Your AWS Access Key ID"

knife[:aws_secret_access_key] = "Your AWS Secret Access Key"
If you already have some EC2 instances running.You can issue a command like this:
knife ec2 server list -r us-west-2
Creating an EC2 instance
Using the Knife EC2 command to create a new EC2 instance is somewhat
complicated. A “simple” version of the command might look something like this:
knife ec2 server create --node-name ec2-node08 \
--groups=launch-wizard-1 \
--region=us-west-2 \
--availability-zone=us-west-2a \
--image=ami-5189a661 \
--server-connect-attribute=public_ip_address \
--flavor=t2.micro \
--ssh-user=ubuntu \
--ssh-key=my_chef_service \
--identity-file=/Users/earlwaud/.aws/my_chef_service.pem \
--run-list=recipe['base']
Bootstrapping an existing EC2 instance
To bootstrap an existing EC2 instance, you will issue a command much like the
one used to bootstrap any other server. It might look something like this:
knife bootstrap 54.213.235.40 \
--node-name my_old_ec2_node \
--ssh-user ubuntu \
--identity-file /Users/earlwaud/.aws/my_chef_service.pem \
--sudo
Deleting EC2 instances
delete --node-name <node-name> --purge
Knife cookbook commands
List - To see a list of all community cookbooks available from Supermarket.
knife cookbook site list
Search - To search particular cookbook
knife cookbook site search mysql
Show - To view more information about a particular cookbook
knife cookbook site show mysql
Download - To download a cookbook as a tar.gz archive and place it in the current working directory
knife cookbook site download mysql
Uploading to the Supermarket
There are a few things you’ll need in place before you can upload your cookbook to the Supermarket.
edit .chef/knife.rb.
node_name "satyacodes"
# Replace with the login name you use to login to the Supermarket.


client_key "#{ENV['HOME']}/.chef/client.pem"
# Define the path to wherever your client.pem file lives.  This is the key you generated when you signed up for a Chef account.

cookbook_path [ '/Users/nshamrell/Projects/my_chef_repo/cookbooks' ]
# Directory where the cookbook you're uploading resides.
Share - to upload the cookbook to the Supermarket
knife cookbook site share "my_apache2_cookbook" "Web Servers"
-Web Servers” - is category my cookbook
Unshare - to Remove your cookbook from the Supermarket.
knife cookbook site unshare my_apache2_cookbook
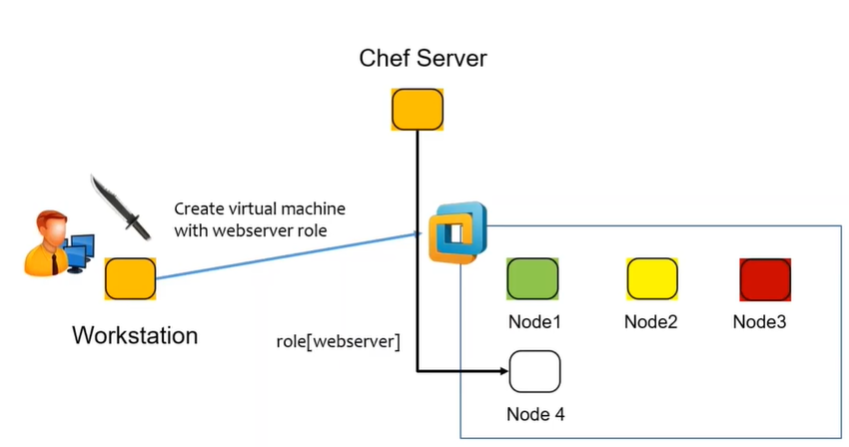
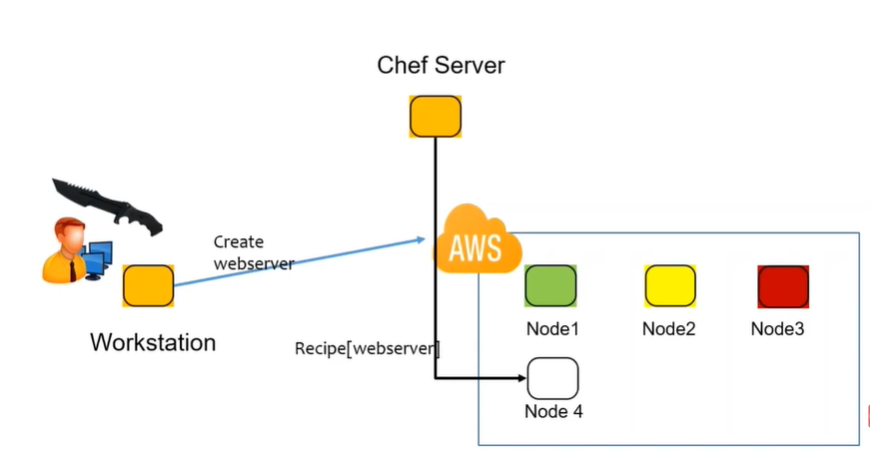
Knife plug-ins to Create New Nodes/ Servers
Knife Plug-in : Create server with VMWare plugin

Knife Plug-in : Create server with AWS EC2 plugin
