Jenkins – continuous delivery pipeline
Differences Between Continuous Integration, Delivery, and Deployment
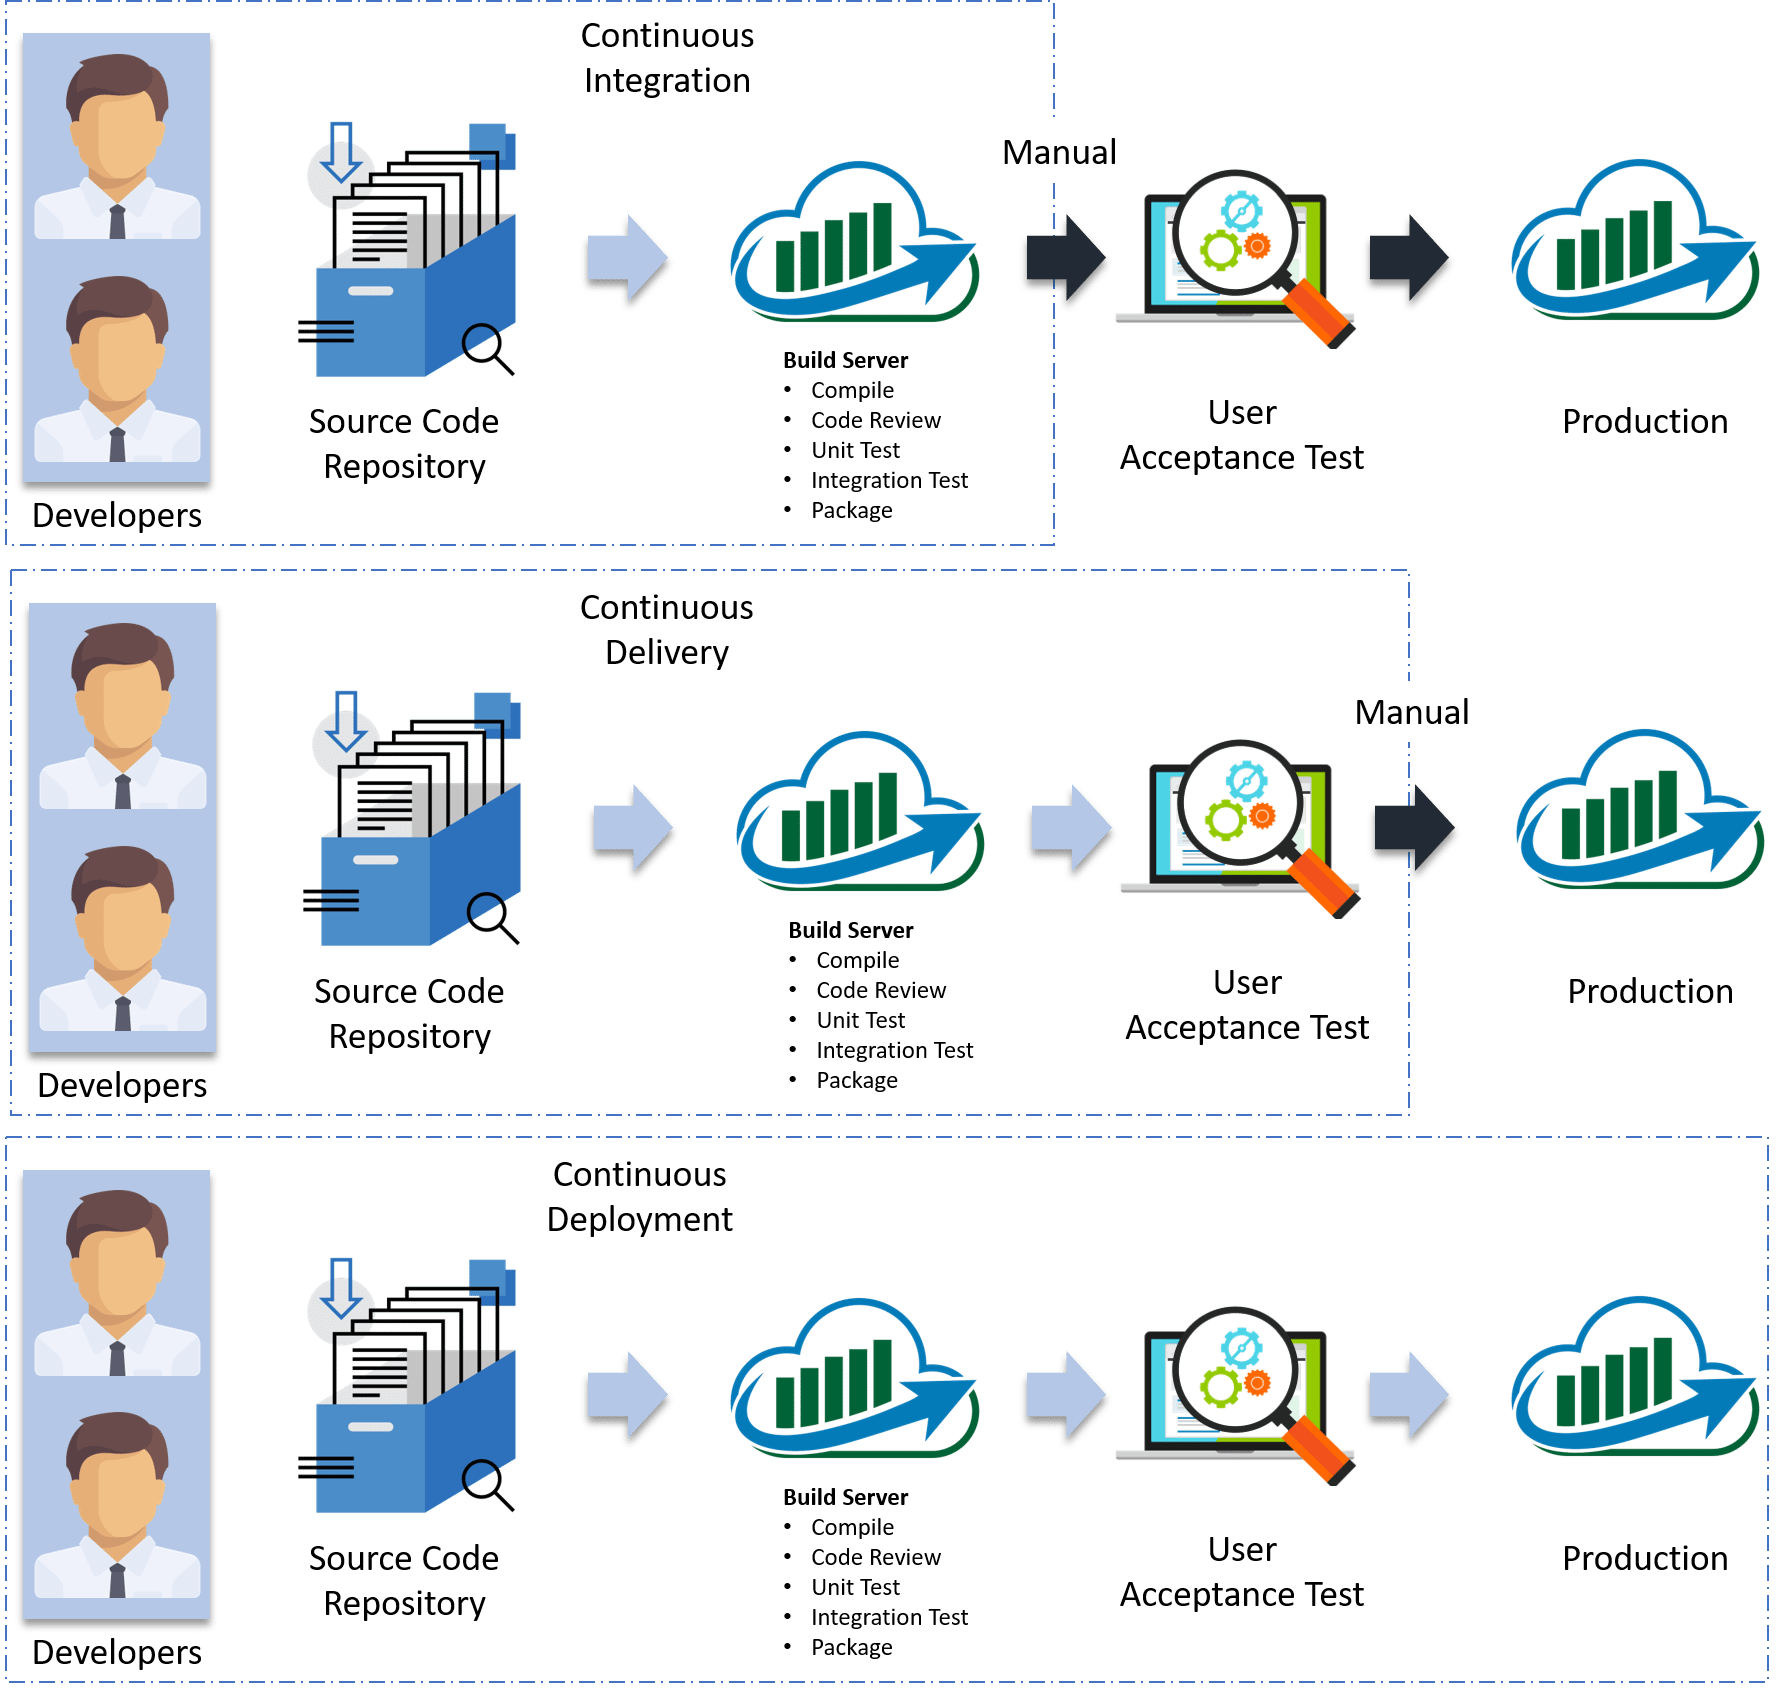
Continuous Integration, every code commit is built and tested, but, is not in a condition to be released. I mean the build application is not automatically deployed on the test servers in order to validate it using different types of Blackbox testing like - User Acceptance Testing (UAT).
Continuous Delivery, the application is continuously deployed on the test servers for UAT. Or, you can say the application is ready to be released to production anytime. So, obviously Continuous Integration is necessary for Continuous Delivery.
Continuous Deployment is the next step past Continuous Delivery, where you are not just creating a deployable package, but you are actually deploying it in an automated fashion.
Continuous Delivery Pipeline
A pipeline is a collection of jobs. Suppose I’m developing a small application on Jenkins and I want to build, test and deploy it.
To do this, I will allot 3 jobs to perform each process. So, job1 would be for build, job2 would perform tests and job3 for deployment. I can use the Jenkins build pipeline plugin to perform this task. After creating three jobs and chaining them in a sequence, the build plugin will run these jobs as a pipeline
We are using below GitHub repo for Building pipeline
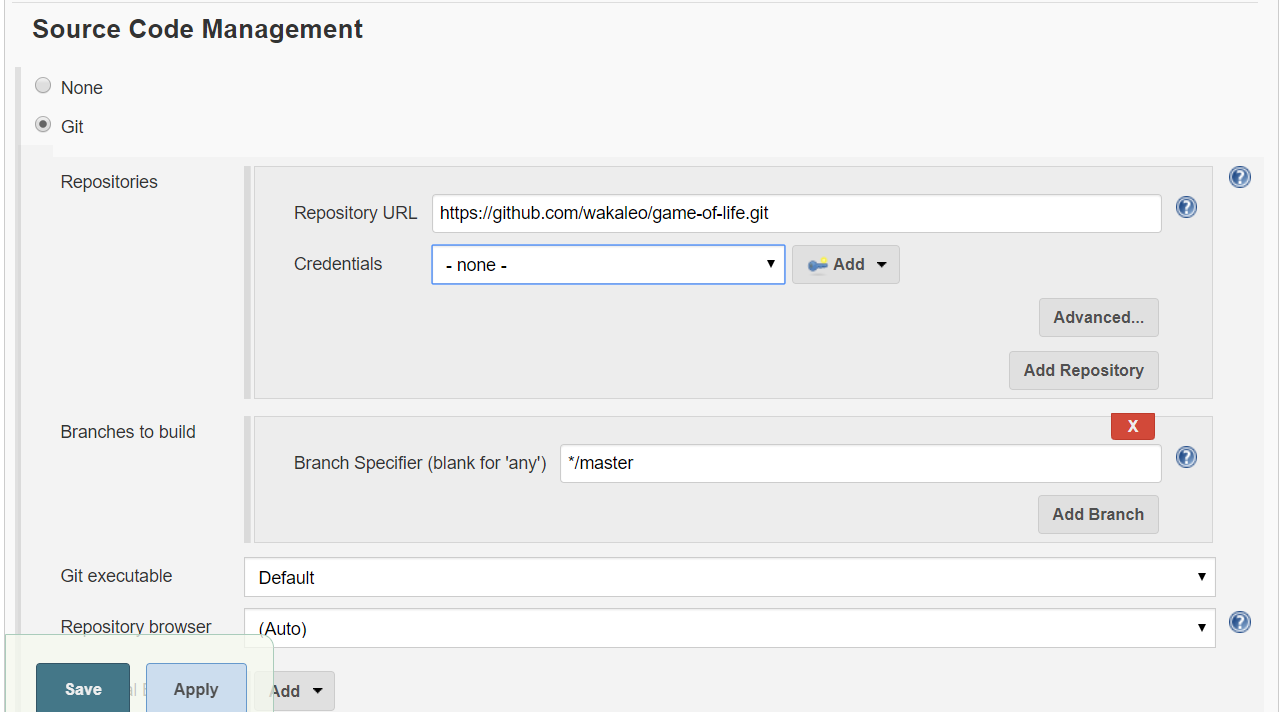
https://github.com/wakaleo/game-of-life.git
This is a Maven Project. We have following lifecycles in Maven
Following is the list of build phases:
-
validate - validate the project is correct and all necessary information is available
-
compile - compile the source code of the project
-
test - test the compiled source code using a suitable unit testing framework.
-
package - package compiled code to distributable format, such as a JAR/war.
-
verify - run any checks on results of integration tests to ensure quality criteria are met
-
install - install the package into the local repository, for use as a dependency in other projects locally
-
deploy - copies the final package to the remote repository for sharing with other developers and projects.
Using Delivery Pipeline Plug-in
Steps Involved in the Demo
-
Fetching the code from GitHub
-
Compiling the source code
-
Unit testing and generating the JUnit test reports
-
Packaging the application into a WAR file
-
Deploying it on the Tomcat server.

Install Delivery Pipeline plugin

1.Fetching the code from GitHub & Compile
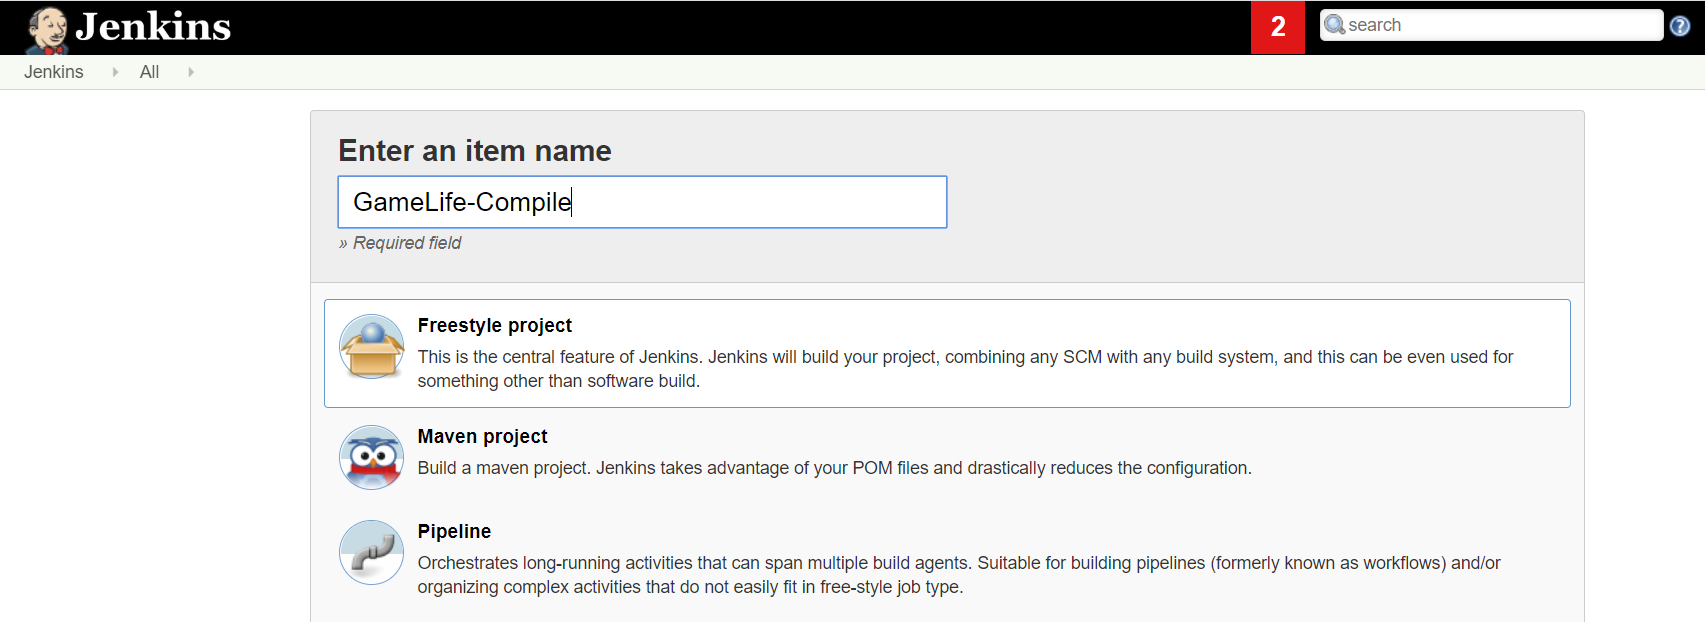
New Item > Freestyle
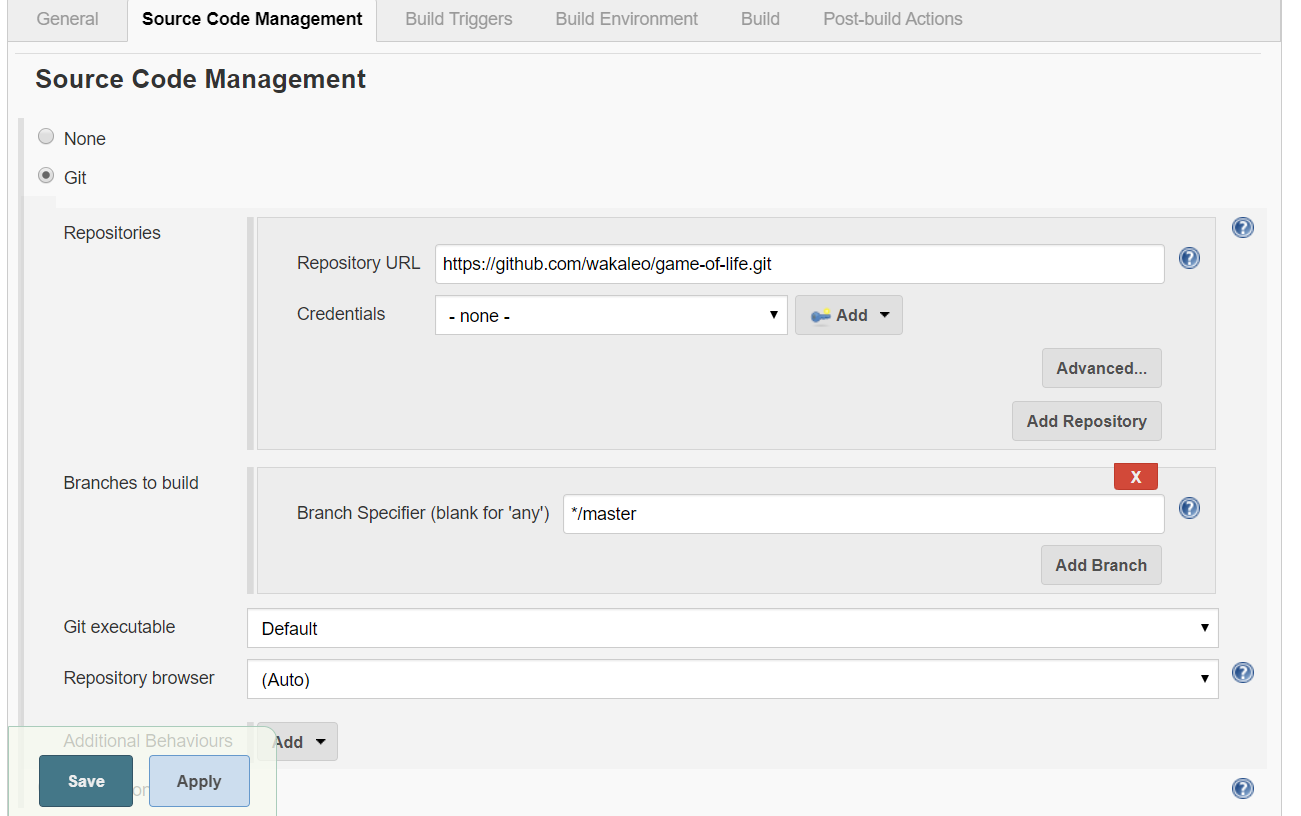
source code Management > select “git” : add the repository URL
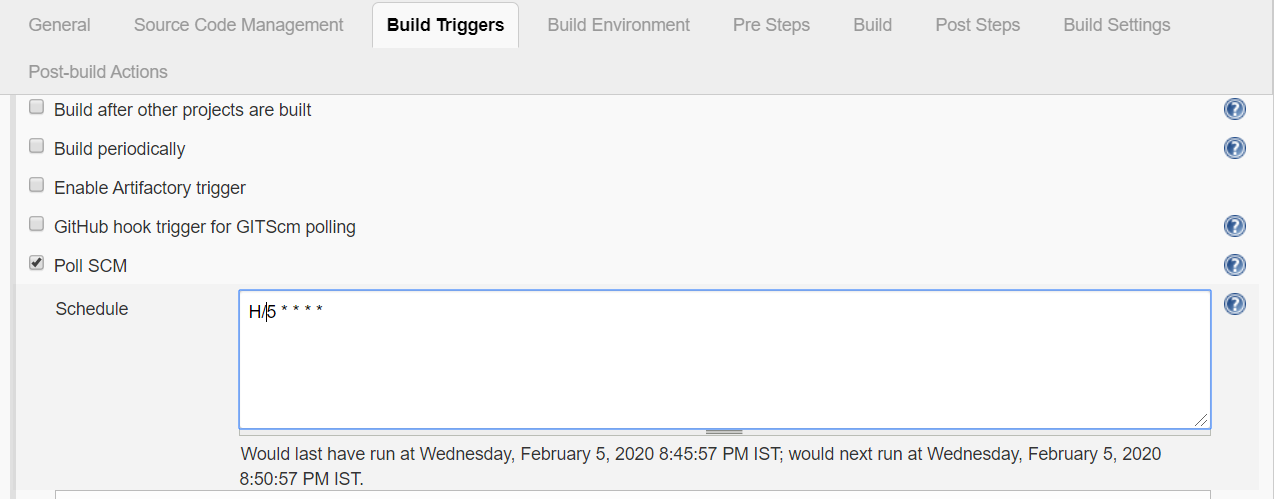
Jenkins to poll the GitHub repository after every 5 minutes for changes in the code
At Build Step > Invoke top level Maven targets. we are just compiling Source Code
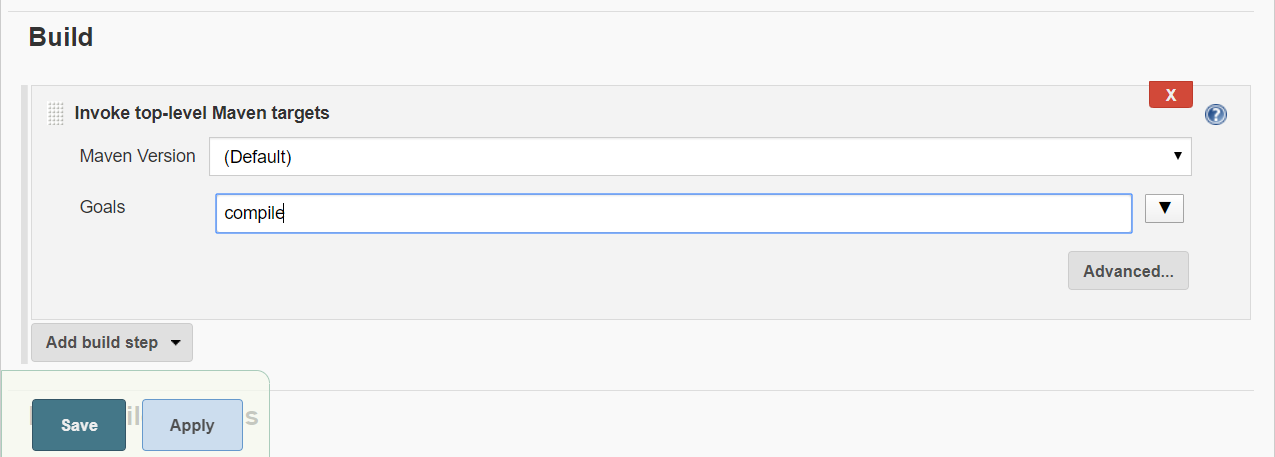
Save & Build Now.
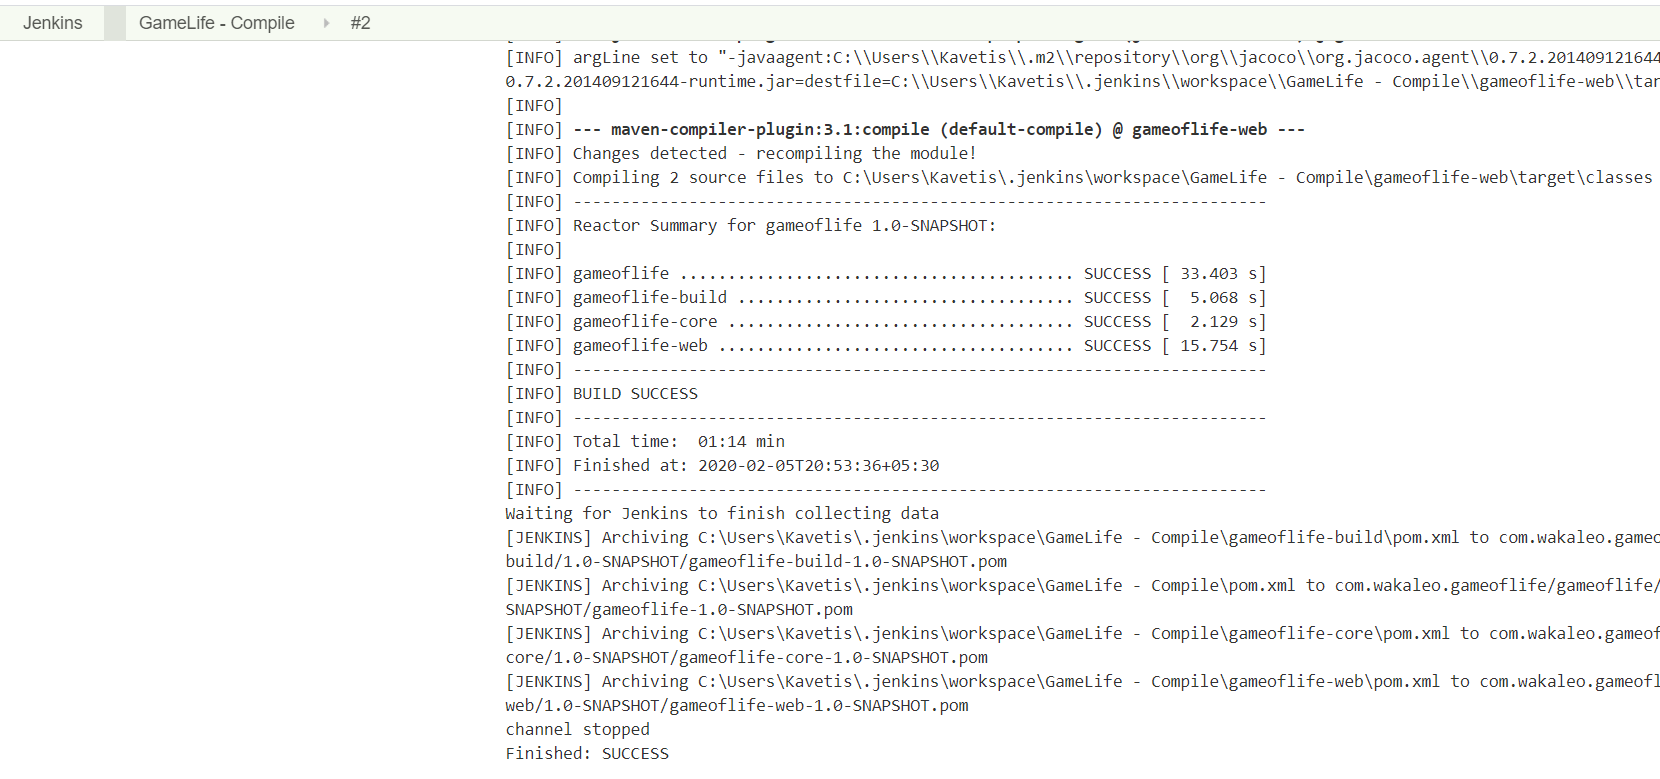
2.Unit testing and generating the JUnit test reports
Now we will create one more Project for unit testing – -Gamelife-Testing”. Add the same repository URL in the source code management tab, like we did in the previous job.
Now, in the “Build Trigger” tab click on the “build after other projects are built”. Here we Do Unit Testing only if GameLife-Compile job build & it is stable.
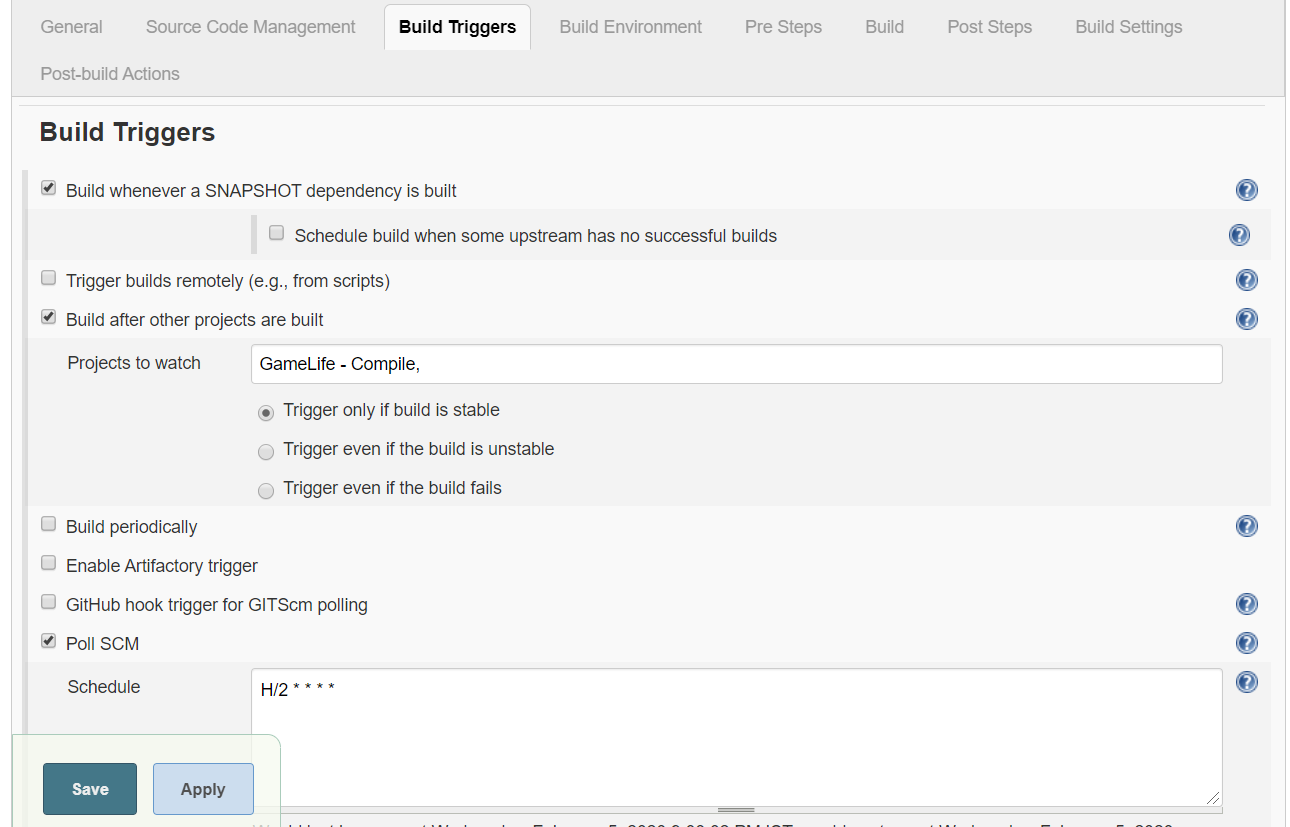
Pre-Build Actions > Add > invoke top level maven targets > ‘test’ command

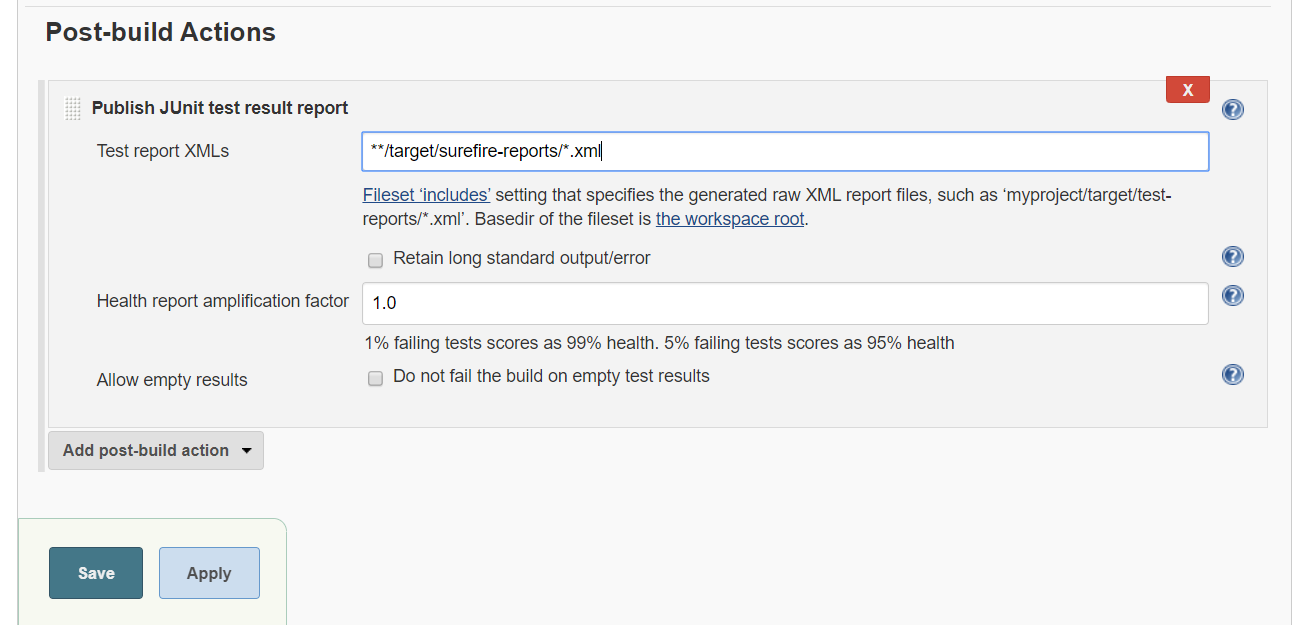
Post-build Actions > section and tick “Publish JUnit test result report” checkbox.
-
When Maven runs unit tests in a project, it automatically generates the XML test reports in a directory called surefire-reports. Enter
**/target/surefire-reports/*.xmlin the “Test report XMLs” field. -
The two asterisks at the start of the path
("**")are a best practice to make the configuration a bit more robust: they allow Jenkins to find the target directory no matter how we have configured Jenkins to check out the source code.
**/target/surefire-reports/*.xml
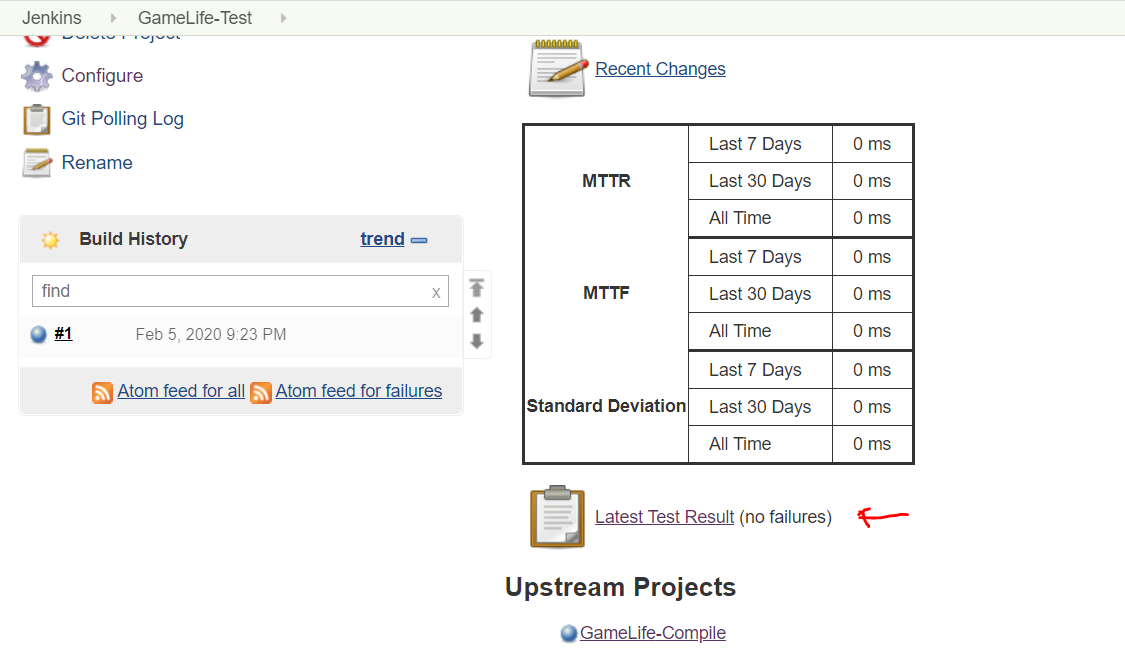
In the Jenkins dashboard, you will also notice the test results:
3.Package & Deploy WAR file
Create ‘GameLife-Deploy’ freestyle project with Same Source Code
- Build Triggers > Build after other projects are built > Projects to watch
- GameLife-Test

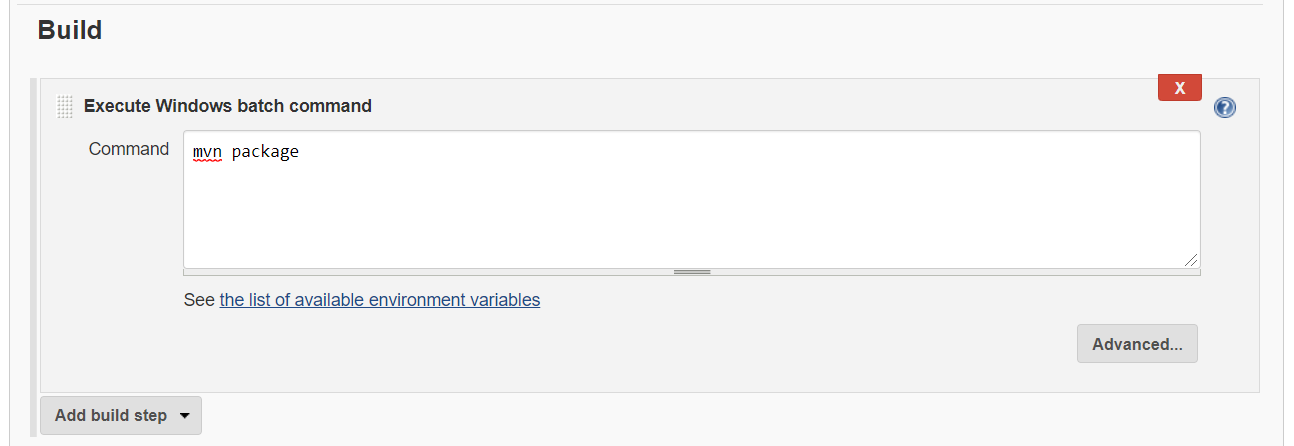
Build > Execute Windows batch command : `mvn package`
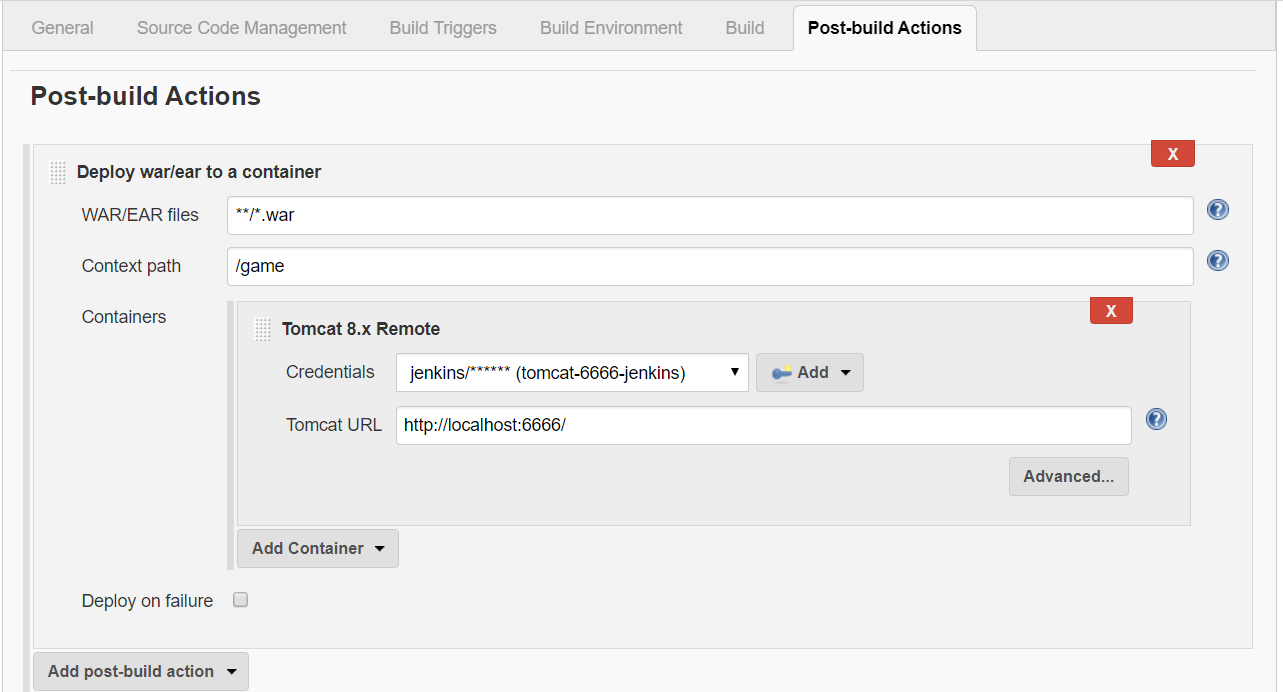
Now, we are going to deploy WAR to Tomcat Server. For that
Go to Post-build Actions > Deploy war/ear to a container : Give Tomcat Details
Save and then select Build Now
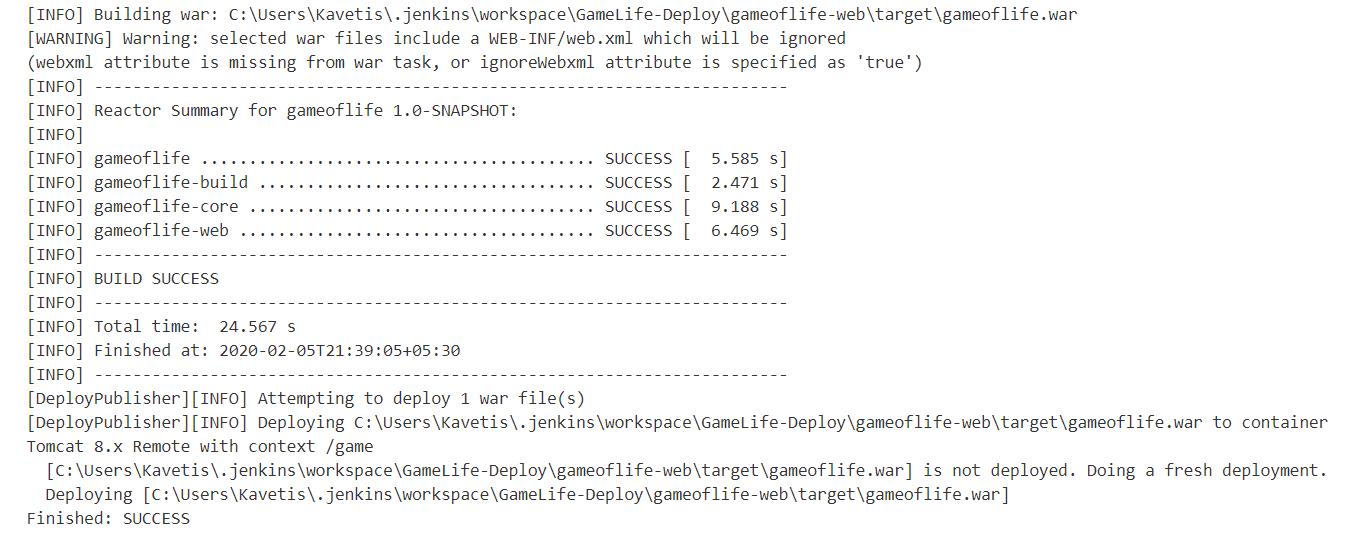
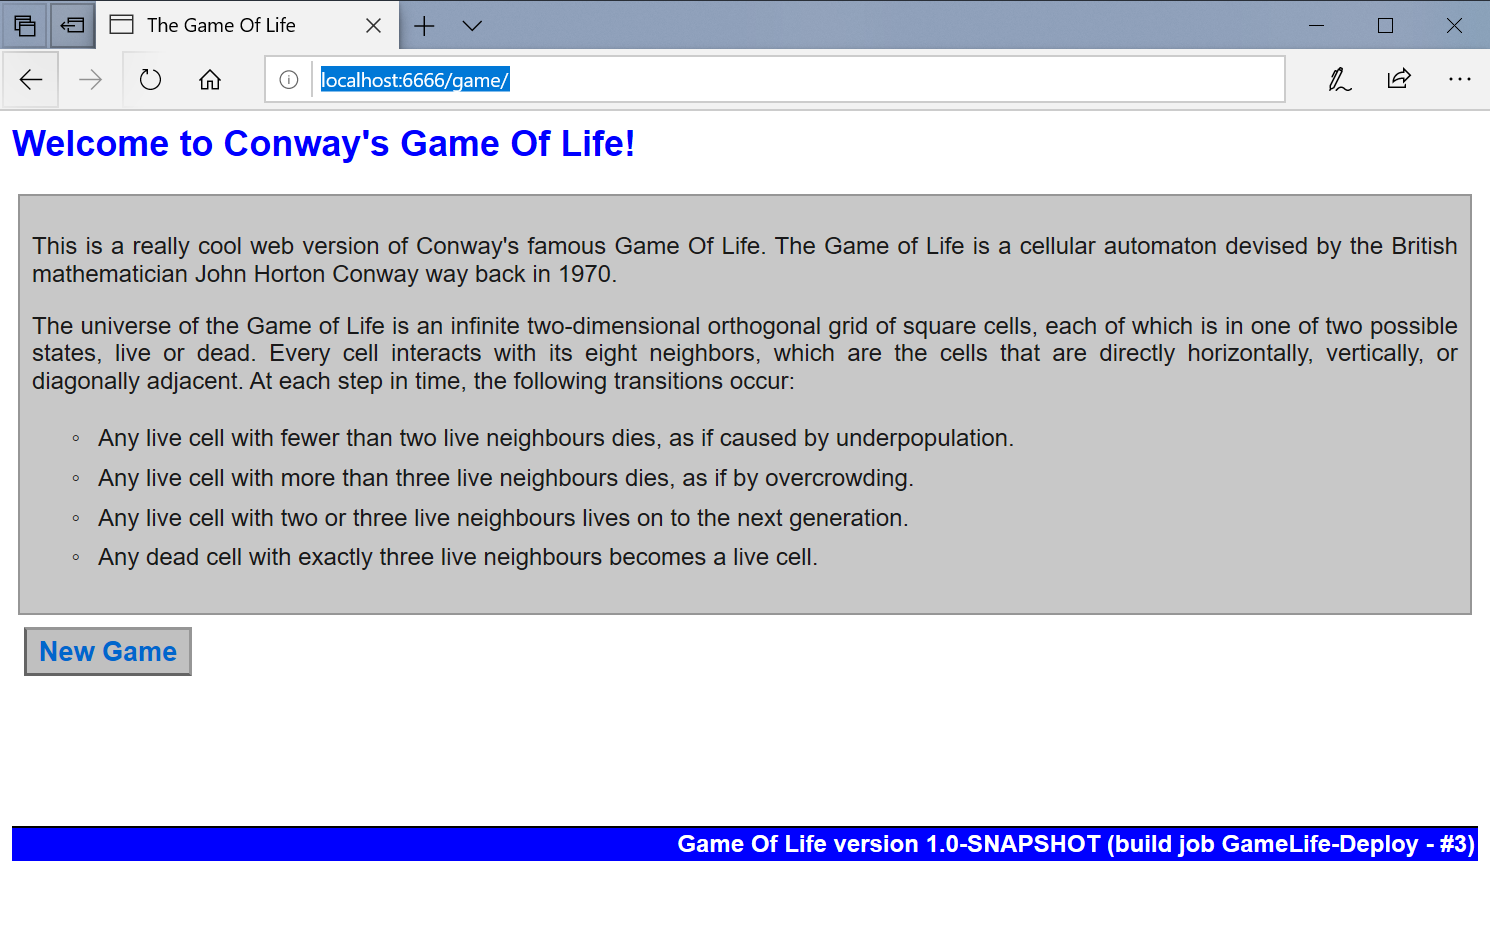
Go to your tomcat URL, with the context path. For me it is - http://localhost:6666/game/
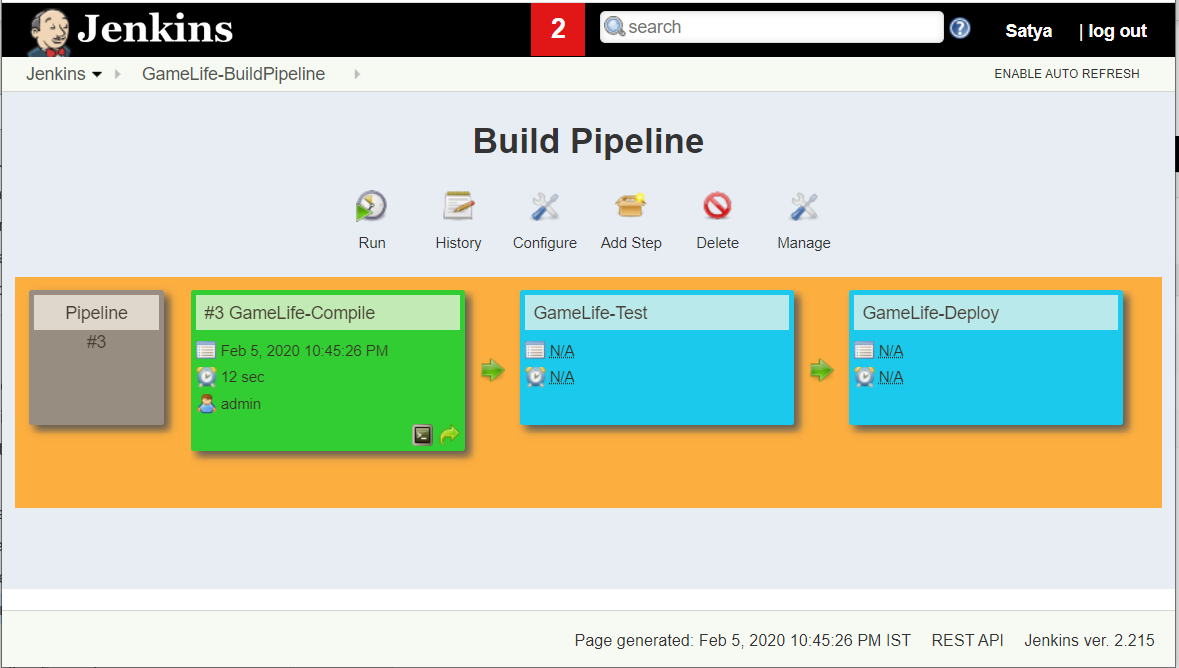
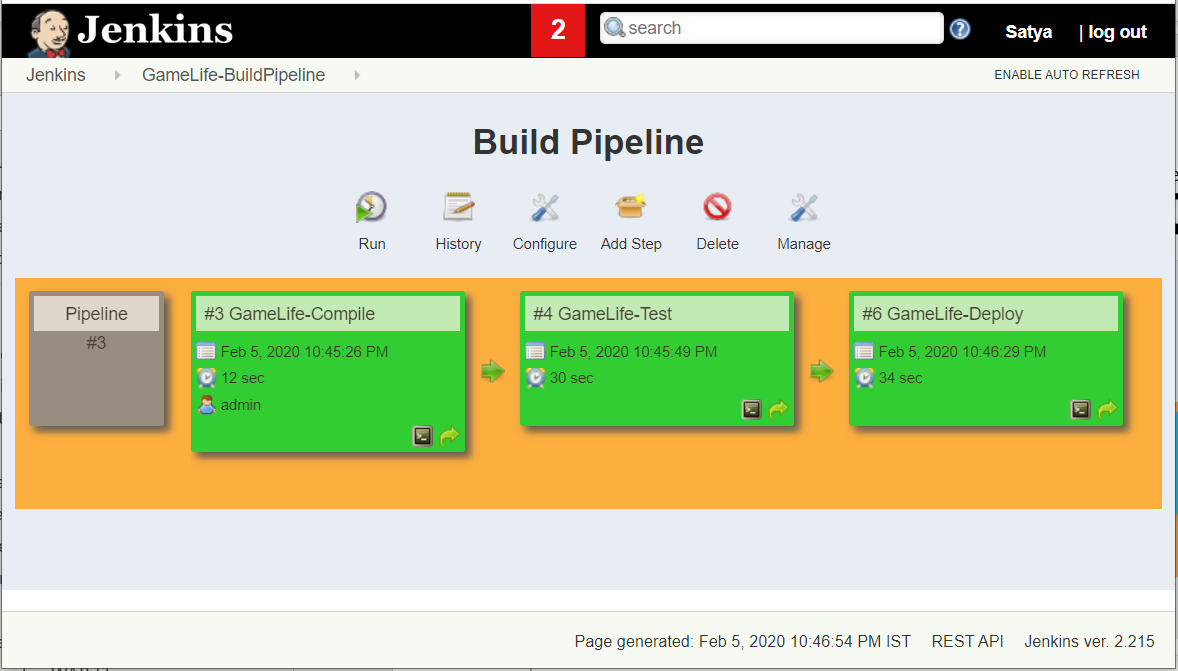
4. Configure Build Pipeline
Add : -Build Pipeline” plug-in
Go to Jenkins Home > Click on + to add new Pipeline
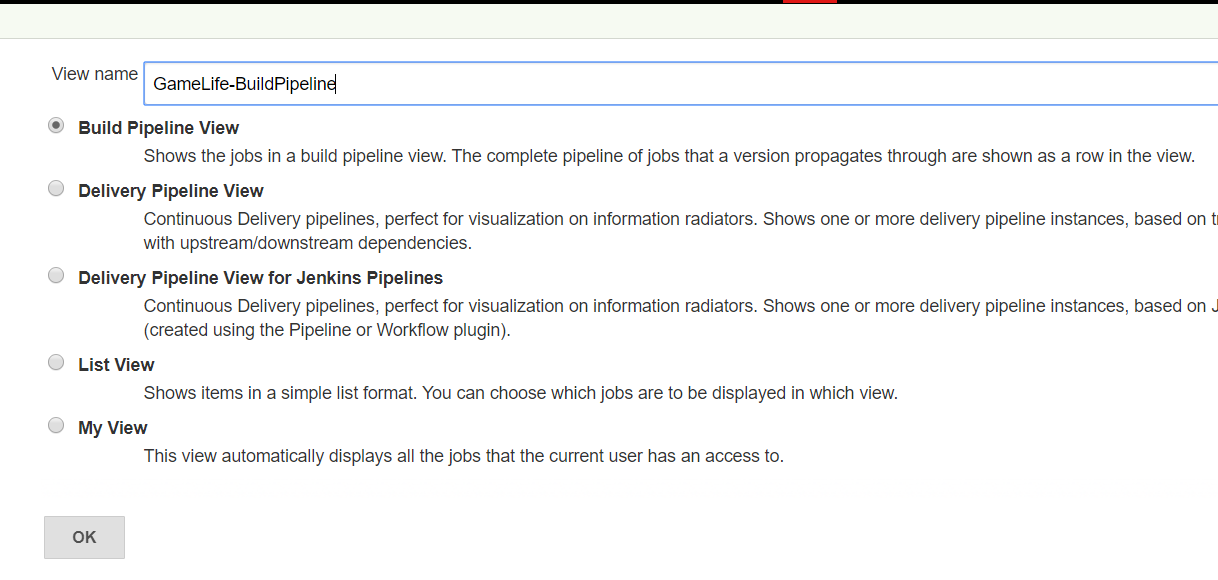
In Details, I’m leaving as it is – just providing Initial Job
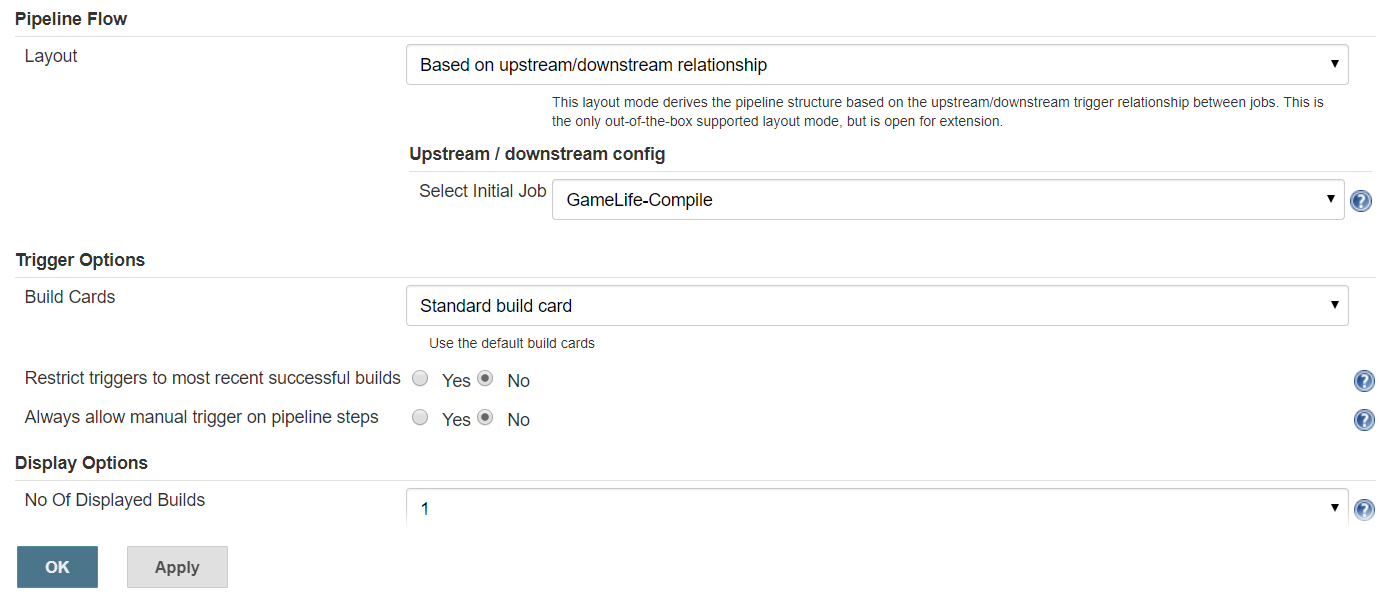
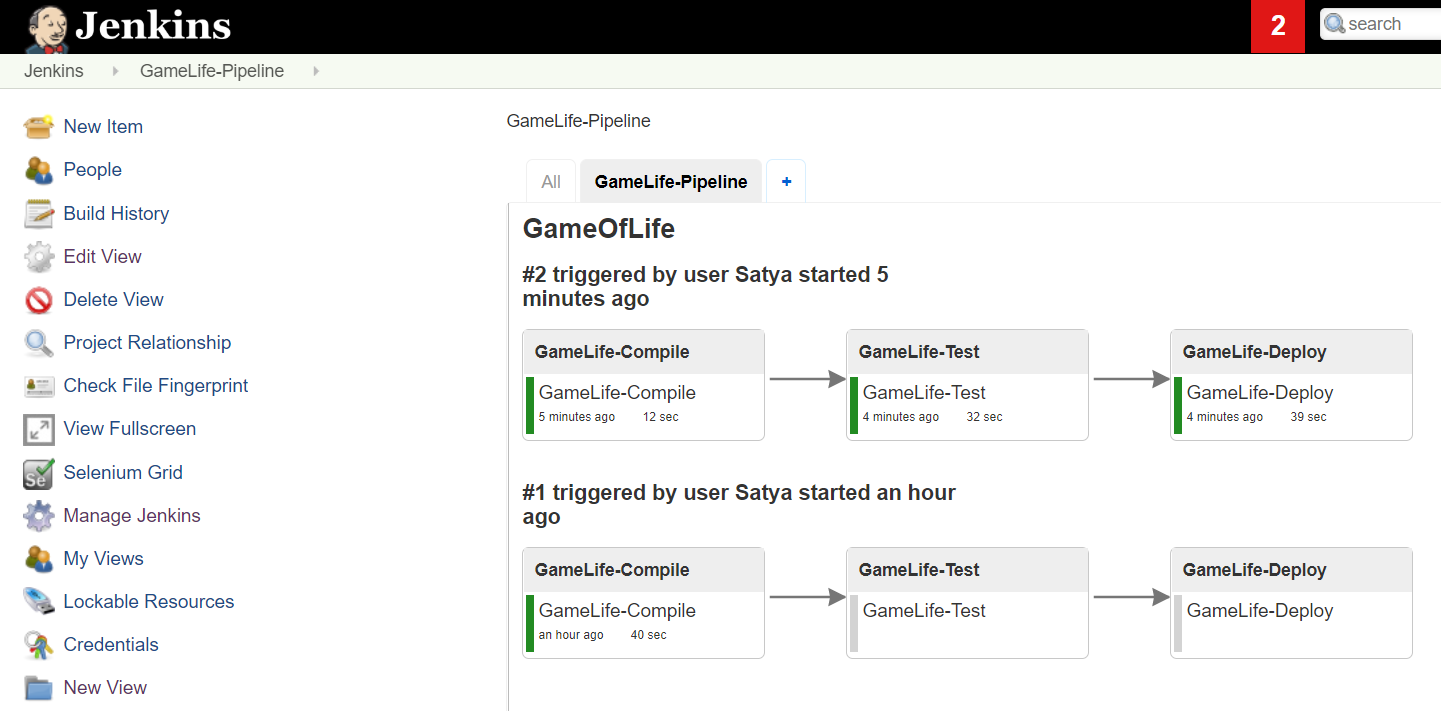
If we build initial job, automatically it triggers all the jobs which are configured in this pipeline.
5. Configure Delivery Pipeline
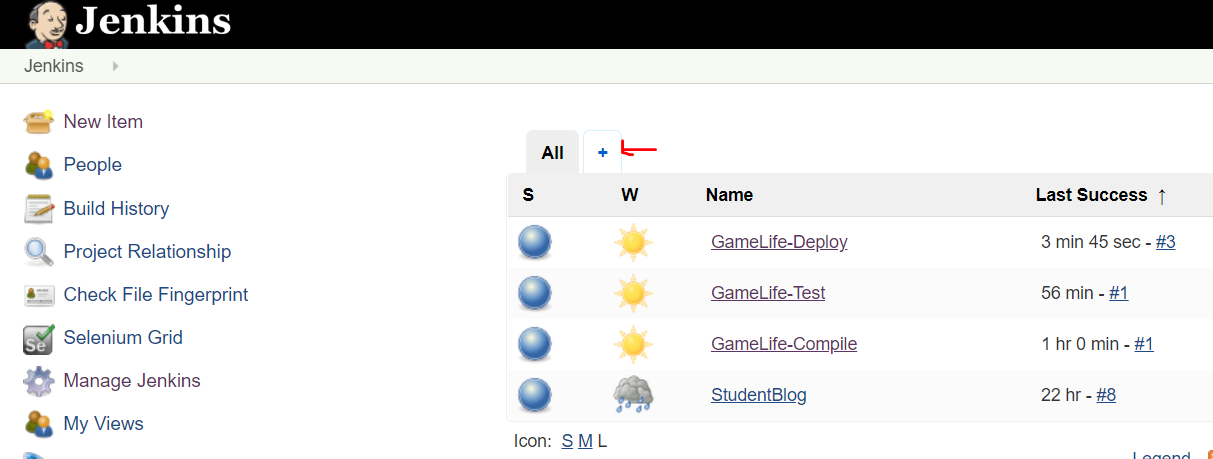
Add : -Delivery Pipeline” plug-in
Go to Jenkins Home > Click on + to add new Pipeline
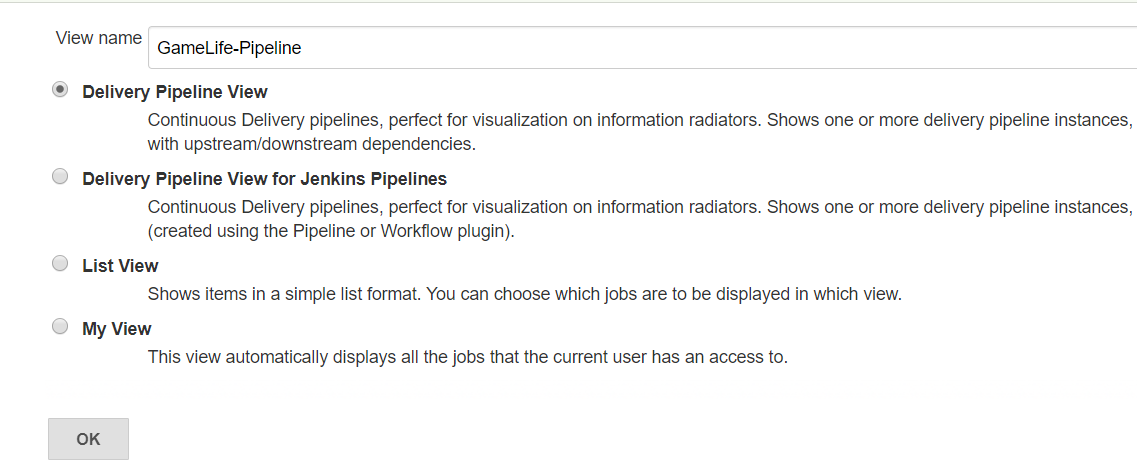
Provide Name & choose Pipeline type
In Details, I’m leaving as it is – just providing Initial Job
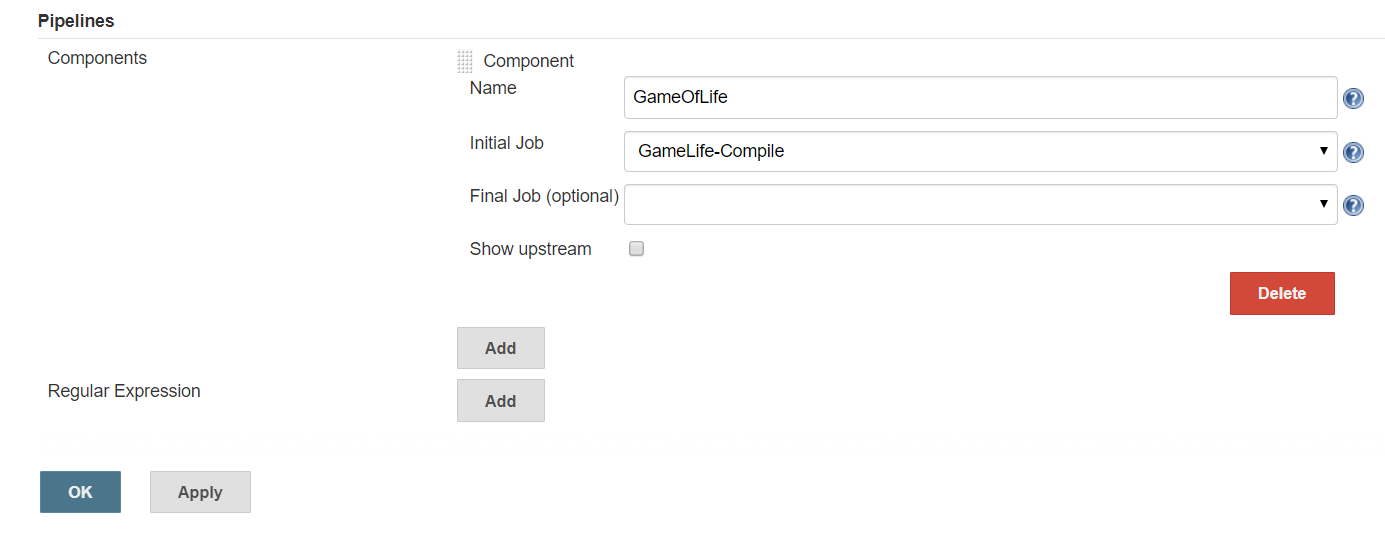
If we build initial job, automatically it triggers all the jobs which are configured in this pipeline.
Using Jenkinsfile
Above approach is effective for deploying small applications. But if you have pipelines with several processes (build, test, unit test, integration test, pre-deploy, deploy, monitor) running 100’s of jobs?
The maintenance cost for such a complex pipeline is huge and increases with the number of processes.To overcome this issue, a new feature called Jenkins Pipeline Project was introduced.
The key feature of this pipeline is to define the entire deployment flow through code. Instead of building several jobs for each phase, you can now code the entire workflow and put it in a Jenkinsfile
It is written based on two syntaxes, namely:
-
Declarative pipeline syntax – Write to SCM repo
-
Scripted pipeline syntax – Write on UI screen
Syntax
Pipeline -The pipeline is a set of instructions given in the form of code for continuous delivery and consists of instructions needed for the entire build process. With pipeline, you can build, test, and deliver the application.
Node - The machine on which Jenkins runs is called a node. A node block is mainly used in scripted pipeline syntax.
Stage - A stage block contains a series of steps in a pipeline. That is, the build, test, and deploy processes all come together in a stage. Generally, a stage block is used to visualize the Jenkins pipeline process.
Step - A step is nothing but a single task that executes a specific process at a defined time. A pipeline involves a series of steps.
Example
New item > pipeline project
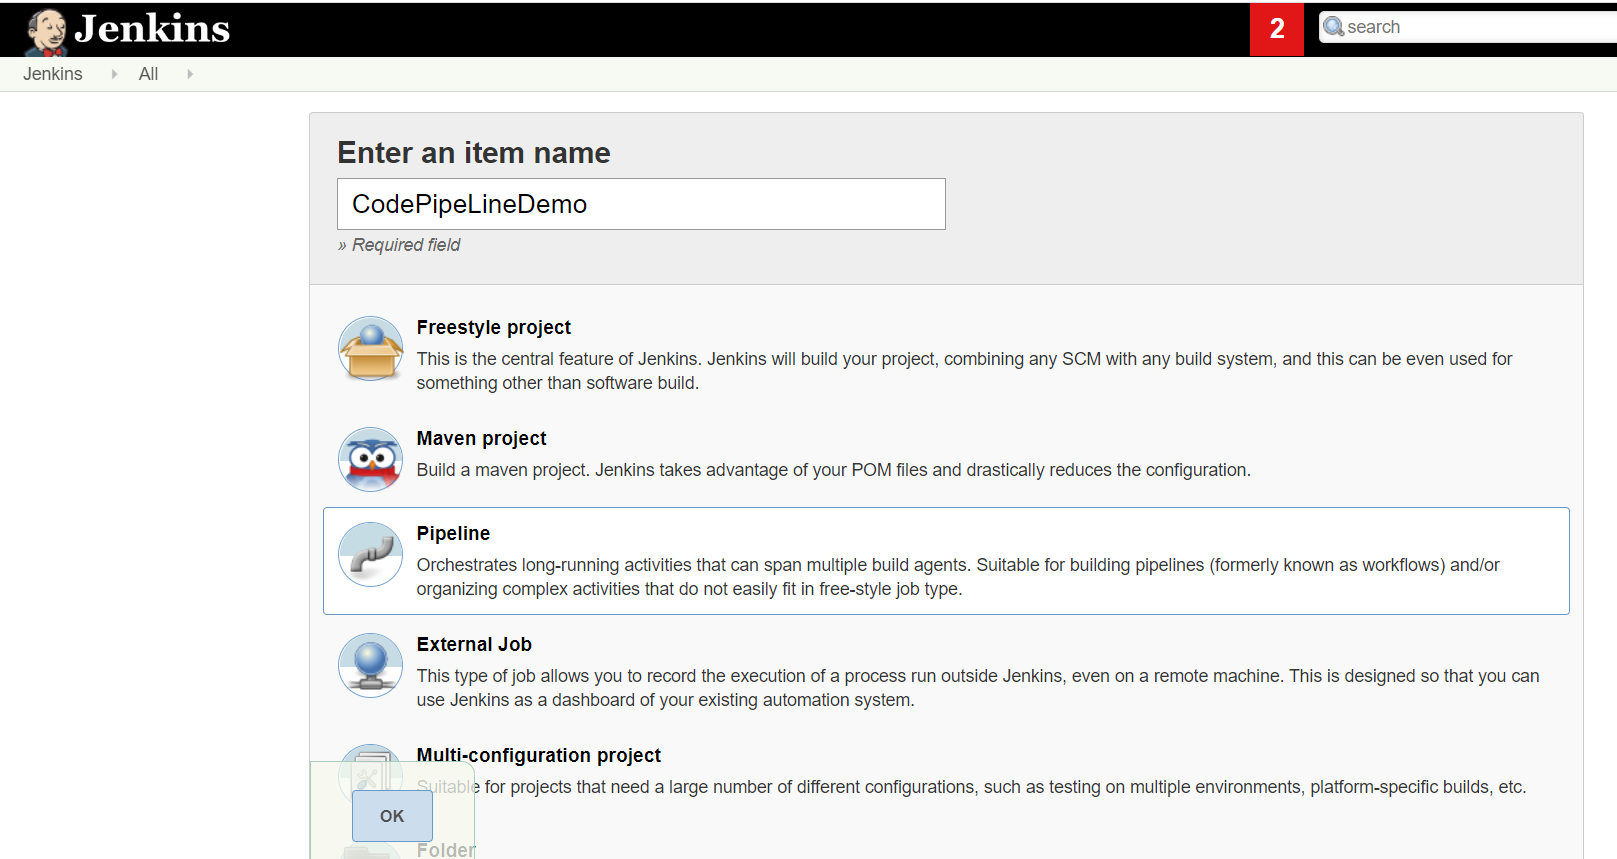
For Declarative pipeline > Choose SCM -provide Jenkinsfile path in repository
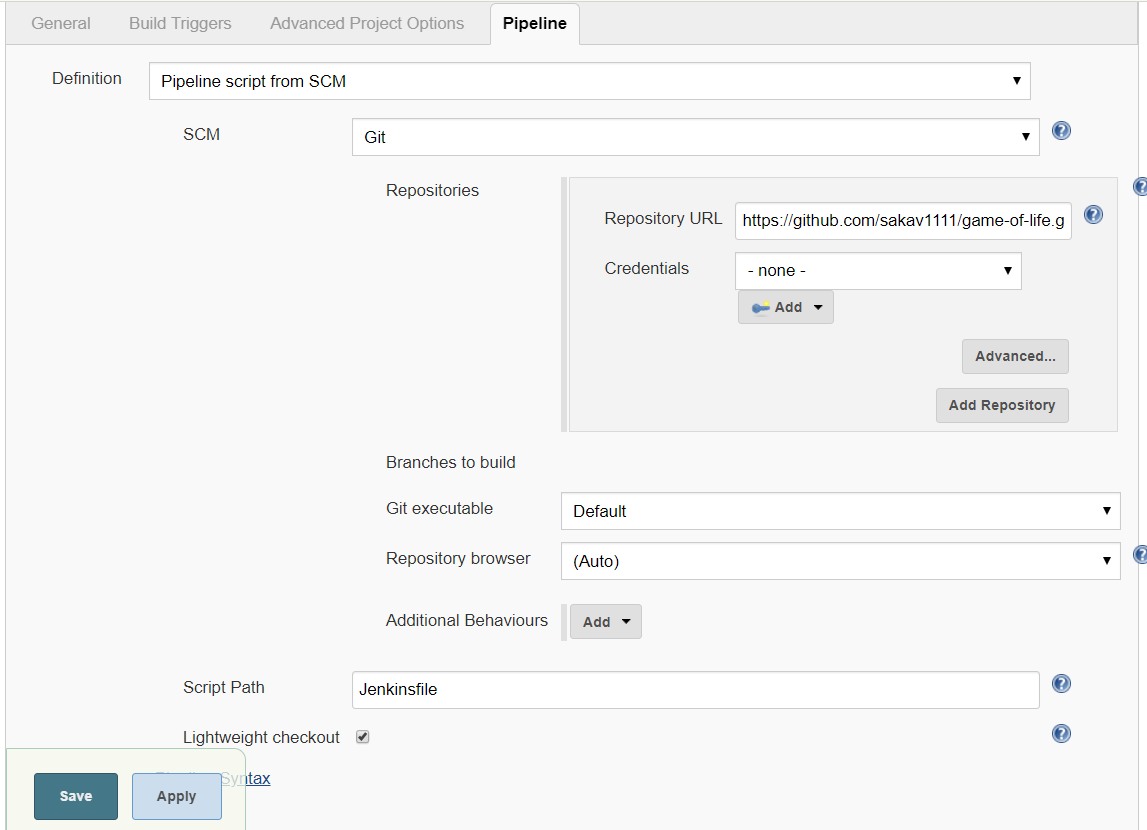
For Scripted pipeline – choose Script - Write Code on UI screen
pipeline {
         agent any
         stages {
                 stage('One') {
                 steps {
                     echo 'Hi, this is Zulaikha from edureka'
                 }
                 }
                 stage('Two') {
                 steps {
                    input('Do you want to proceed?')
                 }
                 }
                 stage('Three') {
                 when {
                       not {
                            branch "master"
                       }
                 }
                 steps {
                       echo "Hello"
                 }
                 }
                 stage('Four') {
                 parallel {
                            stage('Unit Test') {
                           steps {
                                echo "Running the unit test..."
                           }
                           }
                            stage('Integration test') {
                              agent {
                                    docker {
                                            reuseNode true
                                            image 'ubuntu'
                                           }
                                    }
                              steps {
                                echo "Running the integration test..."
                              }
                           }
                           }
                           }
              }
}